![[Day 14] Cisco ISE Mastery Training: Setting Up a Test Switch for Authentication](https://networkjourney.com/wp-content/uploads/2025/08/Day-14-Cisco-ISE-Mastery-Training-Setting-Up-a-Test-Switch-for-Authentication.png)
Trainer Sagar Dhawan
- Posted on
[Day 14] Cisco ISE Mastery Training: Setting Up a Test Switch for Authentication
Table of Contents
Introduction
In Cisco ISE deployments, a Test Switch is your lab’s workhorse. Before rolling NAC (802.1X/MAB) into production, you need a safe environment to test authentication policies, VLAN assignments, and posture checks.
This session walks you through configuring a switch from scratch to talk to ISE, authenticate endpoints, and provide live validation using both CLI commands and ISE GUI logs.
A properly configured test switch is critical for:
- Verifying policy behavior before production rollout
- Avoiding downtime on live networks
- Learning ISE workflows hands-on
Problem Statement
Deploying ISE without pre-testing device configurations can lead to:
- Authentication loops or endpoint lockouts
- VLAN misassignments and network outages
- Misconfigured RADIUS settings that fail silently
Without a dedicated test switch, you risk learning the hard way — directly on production gear.
Solution Overview
Cisco ISE allows you to register a test switch as a network device, apply RADIUS policies, and monitor endpoint authentications in a controlled setup. By integrating a switch in lab mode, you can:
- Validate 802.1X and MAB
- Confirm dynamic VLAN assignments
- Troubleshoot authentication issues before they impact users
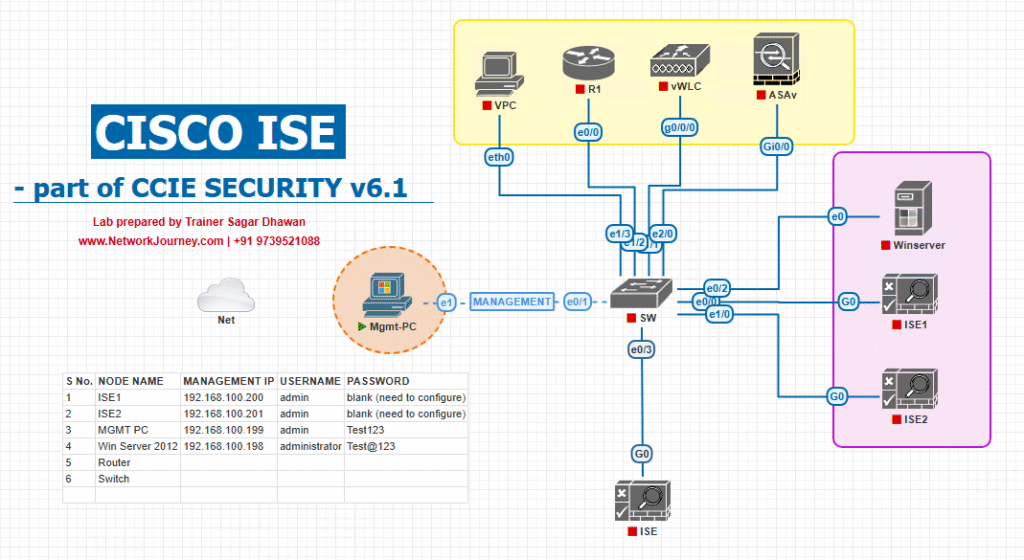
Sample Lab Topology
Text Description:
- VMware/EVE-NG running Cisco ISE (2.7+ recommended)
- 1x Cisco Catalyst Switch (EVE-NG virtual or physical)
- 1x Test Endpoint (Laptop/VM with supplicant enabled)
- Optional: AD server for external authentication
- Management PC with SSH/HTTPS access to switch and ISE GUI
Traffic Flow:
Test endpoint → Switch Access Port → RADIUS request to ISE → Policy check → VLAN assignment → Access granted/denied
Diagram Description:
- ISE authenticates/authorizes the admin (optionally via AD), applies roles/command sets, and logs accounting for every admin action
- Admin PCs SSH to the Test Switch (or WLC) to perform device administration.
- The Switch/WLC forwards TACACS+ (TCP/49) and RADIUS (UDP/1812/1813) requests to Cisco ISE.
Step-by-Step GUI & CLI Configuration Guide
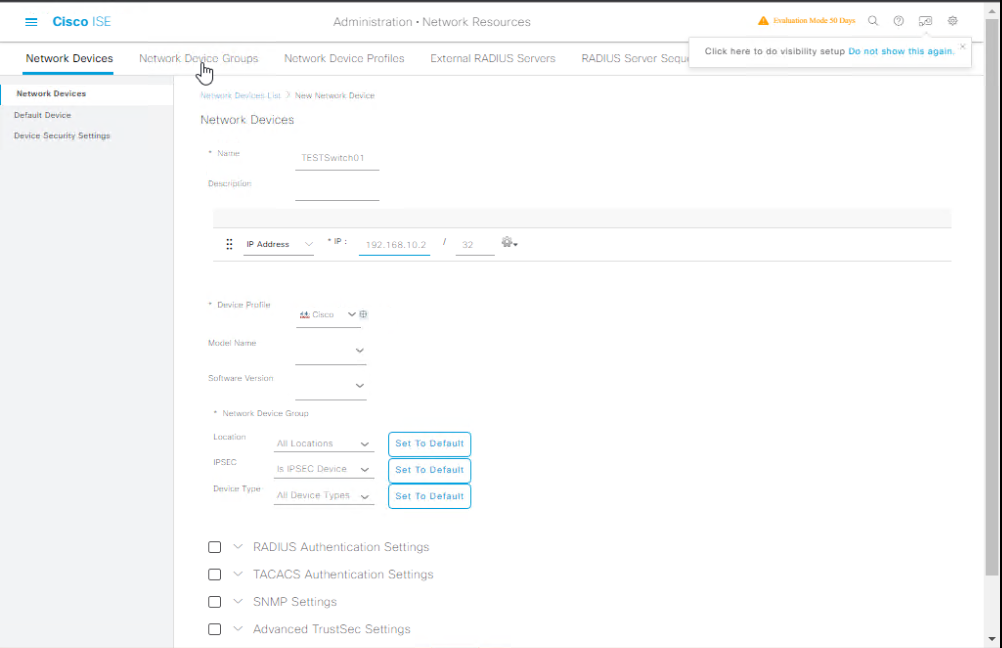
Step A – Add Switch to ISE (GUI)
- Log into ISE GUI.
- Navigate: Administration → Network Resources → Network Devices
- Click Add.
- Fill details:
- Name: TestSwitch01
- IP Address: 192.168.10.2
- Device Type: Switch
- Enable RADIUS Authentication Settings.
- Enter Shared Secret (match CLI config).
- Click Submit.
[Screenshot: ISE Network Device Add Screen]
Step B – Configure Switch for ISE Integration (CLI)
conf t
! Enable AAA
aaa new-model

! Define RADIUS server
radius server ISE1
 address ipv4 192.168.10.10 auth-port 1812 acct-port 1813
 key MySharedSecret

! AAA Authentication & Authorization
aaa authentication dot1x default group radius
aaa authorization network default group radius
aaa accounting update periodic 5
aaa accounting dot1x default start-stop group radius

! Enable 802.1X globally
dot1x system-auth-control

! Configure an access interface
interface FastEthernet0/1
 switchport mode access
 authentication port-control auto
 mab
 dot1x pae authenticator
 spanning-tree portfast

! Set RADIUS as source interface
ip radius source-interface vlan 10
end

! Save config
write memory
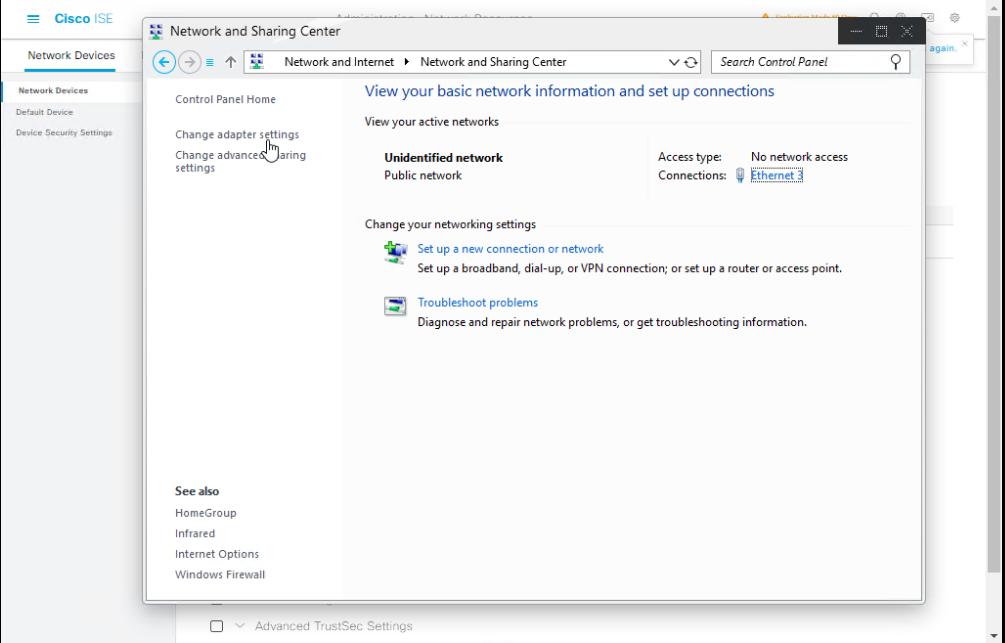
Step C – Enable Endpoint Supplicant (Windows example)
- Go to Control Panel → Network and Sharing Center.
- Click active Ethernet → Properties.
- Enable 802.1X under Authentication tab.
- Choose PEAP and validate certificate if using EAP-TLS.
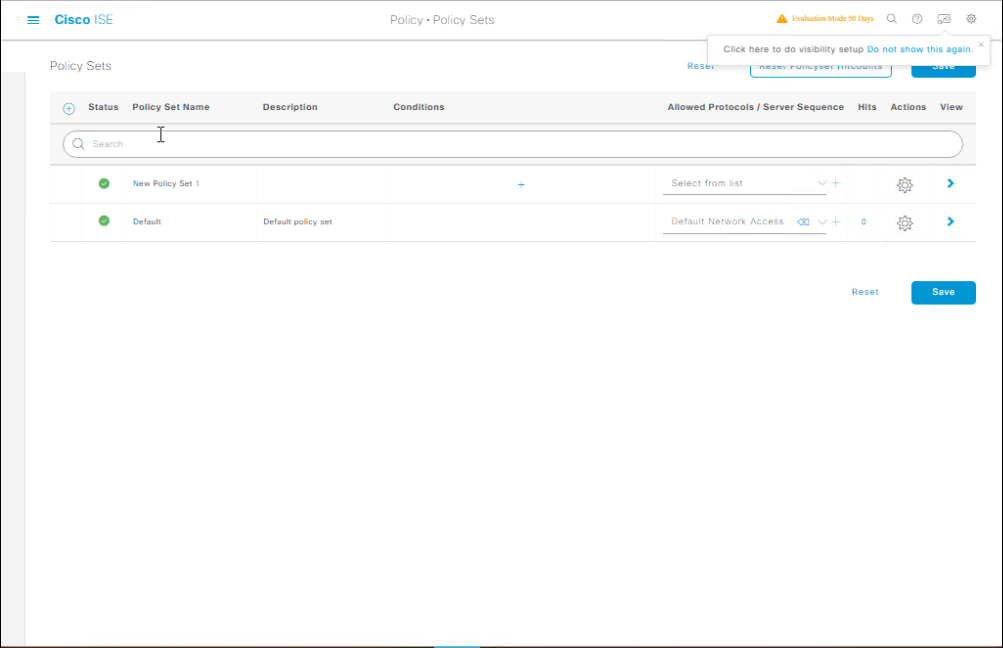
Step D – Create ISE Policy Set for Test Switch
- Policy → Policy Sets → Add
- Name:
Lab_Switch_Auth_Test - Condition: Device Type = Switch AND IP = 192.168.10.2
- Authentication Policy:
- 802.1X: Use Internal Users or AD
- MAB: Internal Endpoints
- Authorization Policy:
- 802.1X: VLAN 20
- MAB: VLAN 30 (Guest)
[Screenshot: ISE Policy Set Screen]
Step E – Validation
From Switch CLI:
show authentication sessions interface Fa0/1
show aaa servers
debug radius authentication
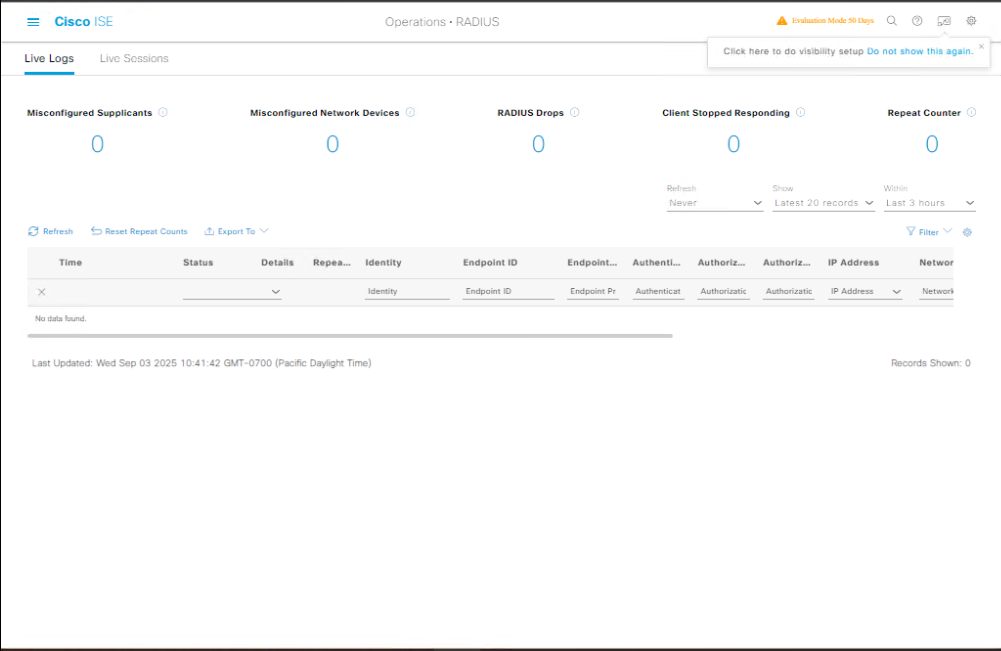
From ISE GUI:
- Go to Operations → RADIUS → Live Logs.
- Check for green checkmarks for success and VLAN assignment details.
FAQs
Q1: Do I need a physical switch or can I use EVE-NG for this lab?
A: You can use either. Physical Catalyst switches give you realistic port-level behavior, but EVE-NG with virtual IOS (IOU or vIOS) works fine for learning the AAA/RADIUS flow. Just ensure the virtual switch image supports 802.1X and MAB commands.
Q2: Which VLAN should I configure on the test switch?
A: Configure an access VLAN for authenticated devices (e.g., VLAN 20) and optionally a guest VLAN (e.g., VLAN 30) for unauthenticated/MAB endpoints. These VLANs should exist on the switch and be routable to ISE.
Q3: What’s the difference between MAB and 802.1X in testing?
A:
- 802.1X: Requires a supplicant (like Windows, macOS, or AnyConnect NAM).
- MAB: Uses MAC address as the credential when no supplicant is present.
When testing, it’s best to configure both so you can simulate different endpoint scenarios.
Q4: My authentication keeps failing — what’s the first thing I should check?
A:
- Verify the shared secret matches between ISE and the switch.
- Check RADIUS reachability using
show aaa servers. - Look at ISE Live Logs for the failure reason — usually, it’s wrong credentials or missing policy match.
Q5: How do I clear a stuck authentication session on the switch?
A: Use:
clear authentication sessions interface Fa0/1
This forces the port to restart the authentication process.
Q6: Can I run 802.1X without enabling it globally?
A: No — dot1x system-auth-control must be enabled globally before any interface can participate in 802.1X authentication.
Q7: What’s the difference between RADIUS Authentication and Authorization?
A:
- Authentication: Verifies the user/device identity (e.g., username/password or MAC).
- Authorization: Decides what access to grant (e.g., VLAN, ACLs, downloadable ACLs) after authentication.
Q8: Can I test downloadable ACLs (dACL) in a lab switch?
A: Yes, as long as the switch IOS supports dACLs. You’ll configure them in the ISE Authorization Profile and see them pushed to the switch during authentication.
Q9: How can I monitor real-time authentication attempts from the switch side?
A: Use:
debug radius authentication
show authentication sessions
And watch ISE’s Operations → RADIUS → Live Logs at the same time to correlate results.
Q10: What’s the minimum configuration I need on the switch for a quick test?
A:
aaa new-model
radius server ISE
 address ipv4 <ISE-IP> auth-port 1812 acct-port 1813
 key <secret>
aaa authentication dot1x default group radius
dot1x system-auth-control
interface Fa0/1
 switchport mode access
 authentication port-control auto
 mab
 dot1x pae authenticator
That’s enough to get basic MAB and 802.1X working for lab validation.
YouTube Link
For more in-depth Cisco ISE Mastery Training, subscribe to my YouTube channel Network Journey and join my instructor-led classes for hands-on, real-world ISE experience
Closing Notes
A test switch is your ISE proving ground. Mastering switch-side 802.1X/MAB configuration and ISE policy mapping here ensures a smooth, outage-free deployment later. Validate every change via CLI and ISE Live Logs for confidence before production rollout.
Fast-Track to Cisco ISE Mastery Pro
Take your Cisco ISE skills from lab to expert-level!
I’ve helped thousands of engineers master ISE through my 4-month Instructor-Led CCIE Security Training. This program combines hands-on labs, real-world deployments, and live troubleshooting so you’re ready for enterprise-grade NAC rollouts.
- Course outline & enrollment: https://course.networkjourney.com/ccie-security/
- Seats are limited – secure your spot today and start your journey toward becoming a Cisco Security expert!
Enroll Now & Future‑Proof Your Career
Email: info@networkjourney.com
WhatsApp / Call: +91 97395 21088
![Performance Routing (PfR) Basics: Optimize Traffic Like a Pro [CCNP ENTERPRISE] networkjourney](https://networkjourney.com/wp-content/uploads/2025/06/nj-blog-post-PFR.jpg)
![Brains Behind Modern Networks: Understanding DNAC, APIC & vManage. [CCNP Enterprise]](https://networkjourney.com/wp-content/uploads/2025/06/Brains-Behind-Modern-Networks-Understanding-DNAC-APIC_-vManage_networkjourney.png)