![[Day 9] Cisco ISE Mastery Training: Creating Internal Users & Groups](https://networkjourney.com/wp-content/uploads/2025/08/Day-9-Cisco-ISE-Mastery-Training-Creating-Internal-Users-Groups.png)
Trainer Sagar Dhawan
- Posted on
[Day 9] Cisco ISE Mastery Training: Creating Internal Users & Groups
Table of Contents
Introduction
Internal users and groups in Cisco ISE let you authenticate accounts that are maintained inside ISE itself rather than in Active Directory. This is vital for:
- Quick lab testing where AD isn’t available.
- Temporary accounts for contractors or lab students.
- Emergency break-glass accounts if external identity stores are unreachable.
- Guest onboarding workflows (short-lived accounts or sponsor-created accounts).
Today you’ll learn how to create internal users and groups, import users in bulk, add them to Identity Source Sequences and Authorization rules, and validate end-to-end authentication — all using GUI actions you can teach to students and CLI checks engineers use to confirm behavior.
Problem Statement
Real networks often need identity that’s fast to create, isolated from AD, and easy to manage for temporary users:
- Relying 100% on AD creates dependency and slows onboarding for contractors or test accounts.
- Guest or lab accounts shouldn’t clutter the enterprise directory.
- During outages, having internal local fallback users can keep critical admin access alive.
We solve this by teaching how to properly configure Internal Users & Groups in ISE and how to use them safely and auditable in policies.
Solution Overview
This lesson covers:
- Creating Internal Identity Groups (logical containers).
- Creating Internal Users and assigning them to internal groups.
- Bulk importing users (CSV) for classes/labs.
- Using Identity Source Sequence to combine AD + Internal fallback.
- Creating Authorization Profiles that reference internal groups.
- Testing via 802.1X / RADIUS and validating in Live Logs and network device CLIs.
You’ll get a reproducible flow for labs and a safe pattern for production fallback accounts.
Sample Lab Topology
Platform: VMware ESXi or EVE-NG.
Components:
- ISE VM (PAN+PSN) —
10.10.10.5 - Optional Windows AD —
10.10.10.10(used if you want hybrid AD+Internal tests) - Catalyst switch (IOSv-L2) — RADIUS client
- WLC (optional) — for WebAuth/802.1X wireless tests
- Windows 10 client (wired) —
DHCPin test VLAN
IP plan (example): management 10.10.10.0/24 — ISE 10.10.10.5, AD 10.10.10.10, switch mgmt 10.10.10.2.
Topology Layout:
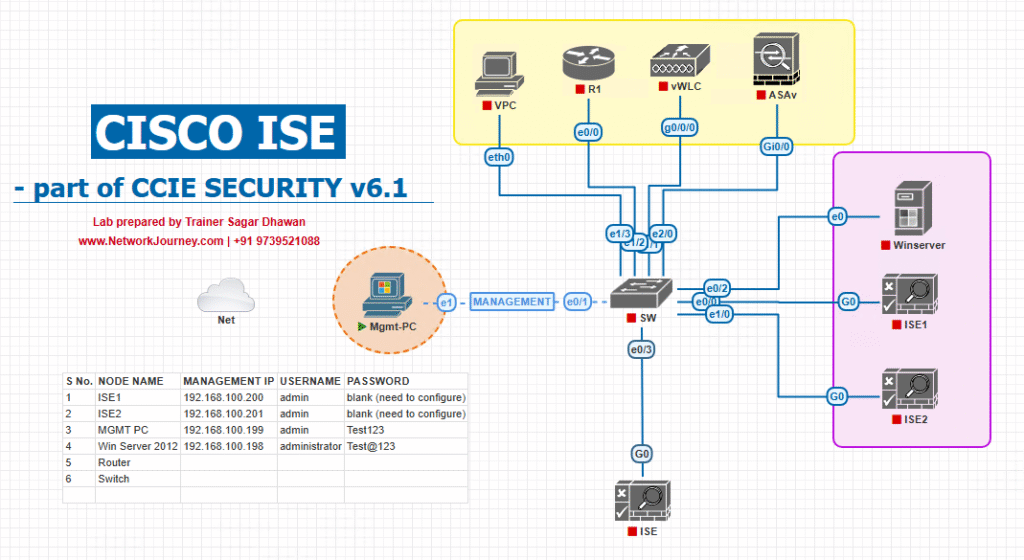
Notes: Keep ISE and Switch on the same routable network; ensure DNS/NTP configured.
Step-by-Step GUI Configuration Guide (with validation steps)
Pre-checks (console / CLI on ISE)
Run these before you begin:
ise/admin# show application status ise
ise/admin# ping 10.10.10.1            # default gateway or switch mgmt
ise/admin# nslookup ise.lab.local 10.10.10.10   # verify DNS (if using AD DNS)
Expected: services Running, network reachable, DNS resolves.
Step 1 — Create Internal Identity Group (GUI)
- Login to ISE Admin UI:
https://<ISE-IP>/admin.
[Screenshot: ISE Admin Login Page] - Go to: Administration → Identity Management → Groups (or Identities → Groups depending on version).
[Screenshot: Administration → Identity Management → Groups]
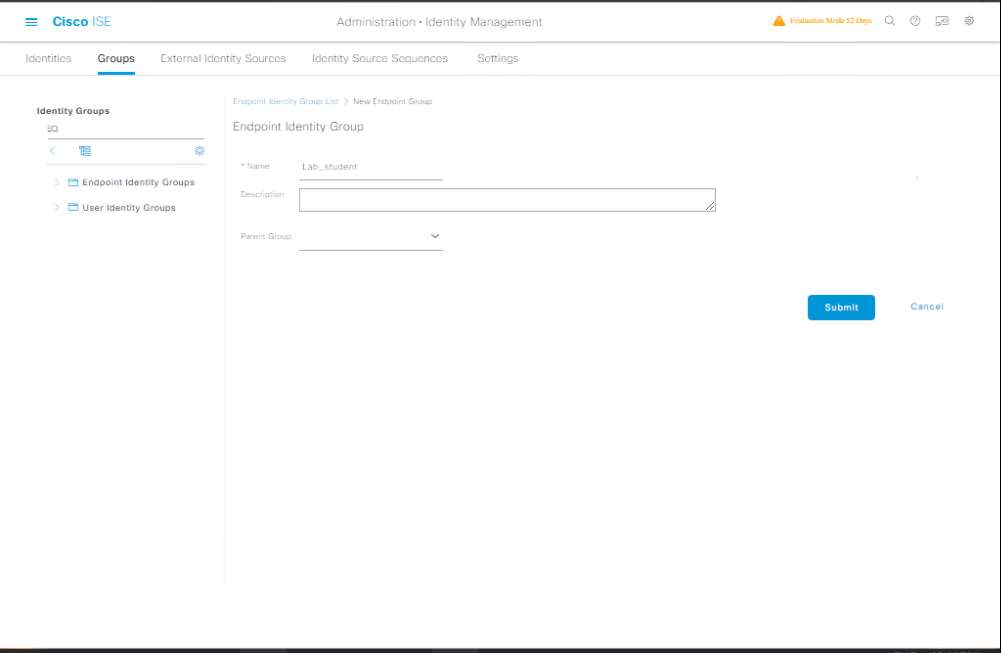
- Click Add → Choose Internal Identity Group (or Internal tab) → Enter:
- Group Name:
Lab_Students - Description:
Temporary lab student accounts - Save.
[Screenshot: New Internal Identity Group Dialog]
- Group Name:
Validation (GUI):
- Search group: Administration → Identity Management → Groups → Search →
Lab_Studentsshould appear.
Notes: Internal groups are static containers; you can use them for Authorization rules and to assign attributes.
Step 2 — Create a Single Internal User (GUI)
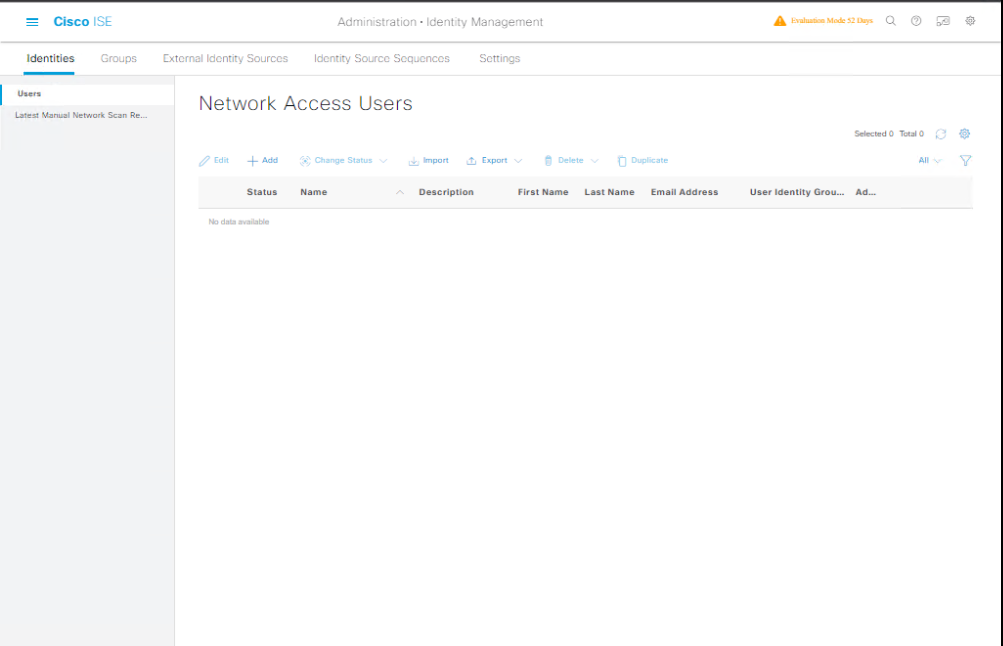
- Navigate: Administration → Identity Management → Identities → Users → Internal Users.
[Screenshot: Administration → Identity Management → Identities → Internal Users]
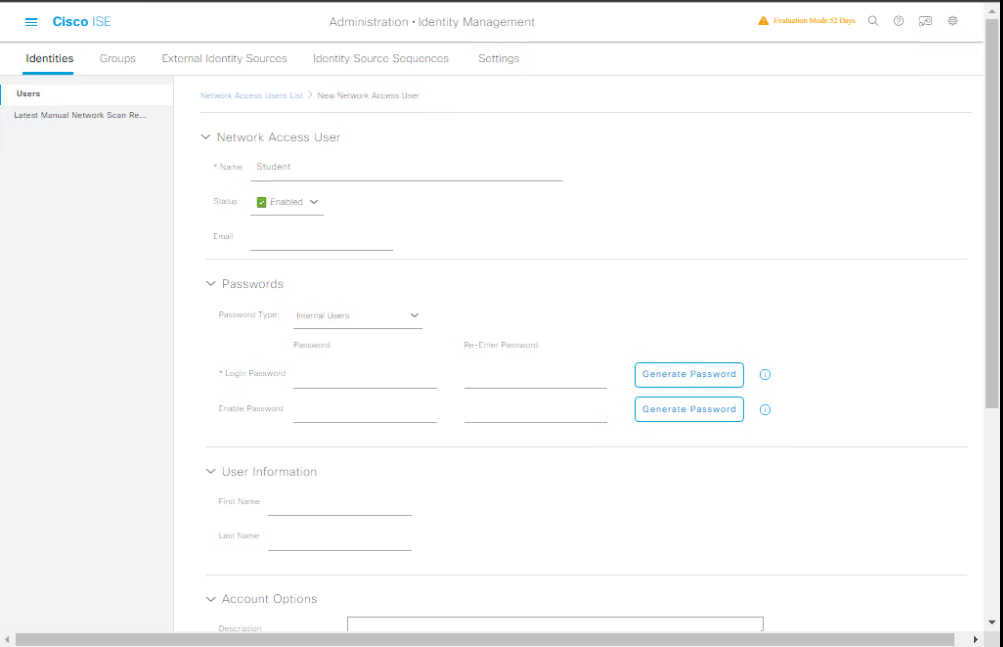
- Click Add. Fill fields:
- Username:
student01 - Password:
StrongP@ss!(choose policy-compliant password) - Email (optional)
- Status:
Enabled - Assign to Group: add
Lab_Studentsin the Groups field. - Set Change Password on Next Login if desired.
- Save.
[Screenshot: Add Internal User Form]
- Username:
Validation (GUI):
- After save, click Search and open the user record. Confirm Groups includes
Lab_Students.
CLI validation (safe general checks):
ise/admin# show application status ise
(Internal user list is GUI-centric; use Operations → Identities → Search for user in GUI to confirm details.)
Step 3 — Bulk Import Internal Users (CSV) — useful for classroom
- Prepare CSV (example
users.csv):
username,password,email,firstName,lastName,groups
student02,Stud!234,student02@lab.local,Student,Two,Lab_Students
student03,Stud!234,student03@lab.local,Student,Three,Lab_Students
- GUI: Administration → Identity Management → Identities → Users → Internal Users → Click Import (CSV).
- Upload
users.csv. Map CSV columns if prompted.
[Screenshot: Internal Users → Import CSV]
- Upload
- Confirm import summary and finish.
Validation (GUI):
- Use Operations → Identities → Search and filter
Type = Internalto verify imported accounts exist.
Tip: For large classrooms, import sets and schedule password resets on first login.
Step 4 — Create Authorization Profile (map group to result)
We’ll create a profile that grants VLAN 100 (lab VLAN) to users in Lab_Students.
- GUI: Policy → Policy Elements → Results → Authorization → Authorization Profiles → Add.
[Screenshot: Policy Elements → Authorization Profiles → Add]
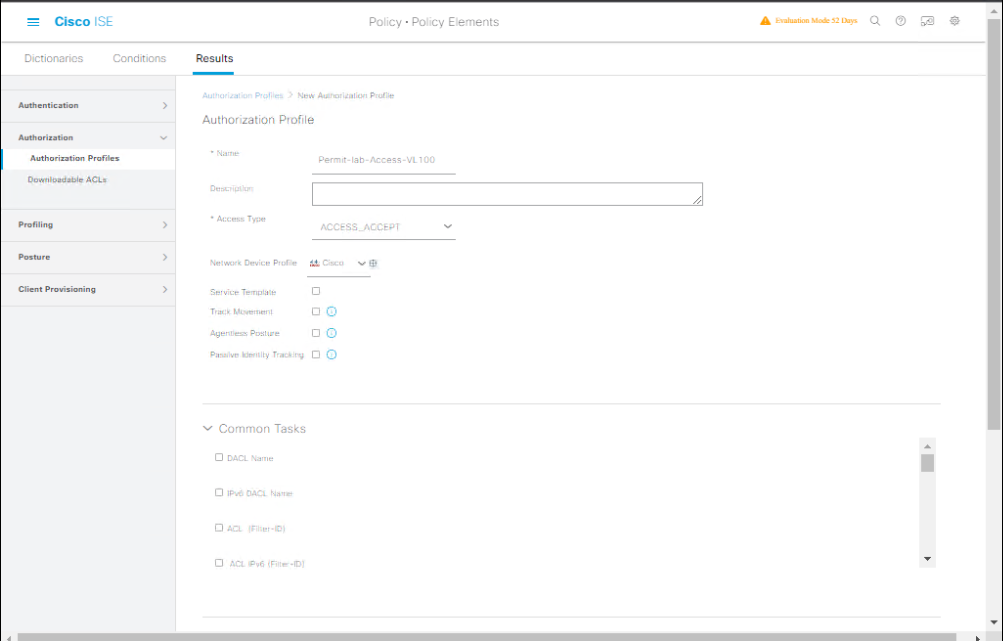
- Name:
Permit-Lab-Access-VLAN100- Access Type:
Access-Accept - Common attributes: set VLAN ID =
100or set downloadable ACL if preferred. - Save.
- Access Type:
Validation: Profile appears in list. Note the exact profile name — you’ll reference it in the policy.
Step 5 — Create Identity Source Sequence (ensure internal lookup order)
- GUI: Administration → Identity Management → Identity Source Sequences → Add.
- Name:
LocalFirst - Order: Internal Users → Active Directory (if AD exists)
- Save.
[Screenshot: Identity Source Sequences]
- Name:
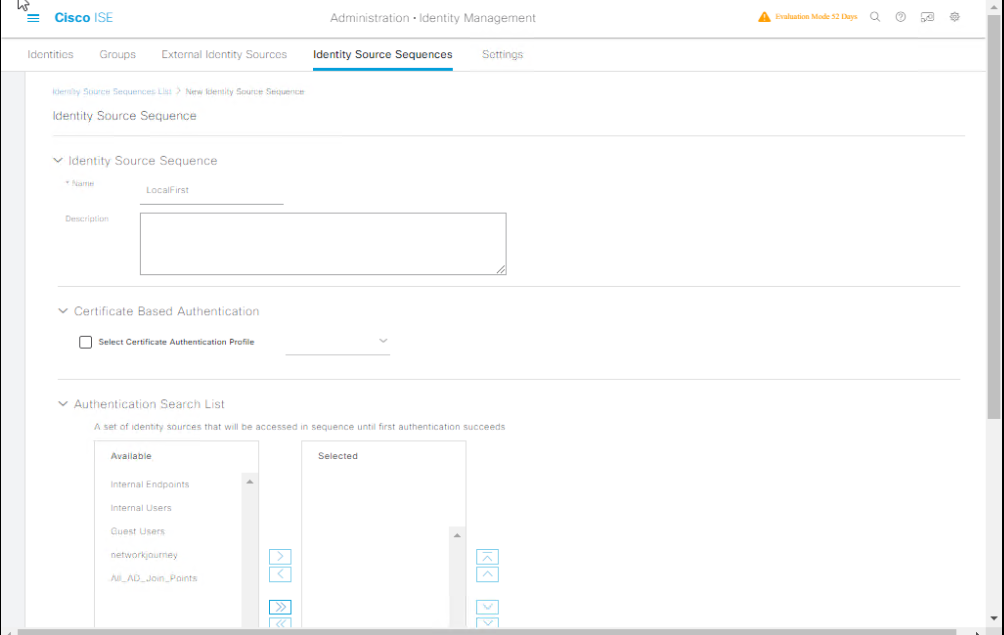
Why: This makes ISE check internal users first, then AD — useful for lab fallback.
Validation (GUI): The sequence is selectable in Policy Sets authentication rules.
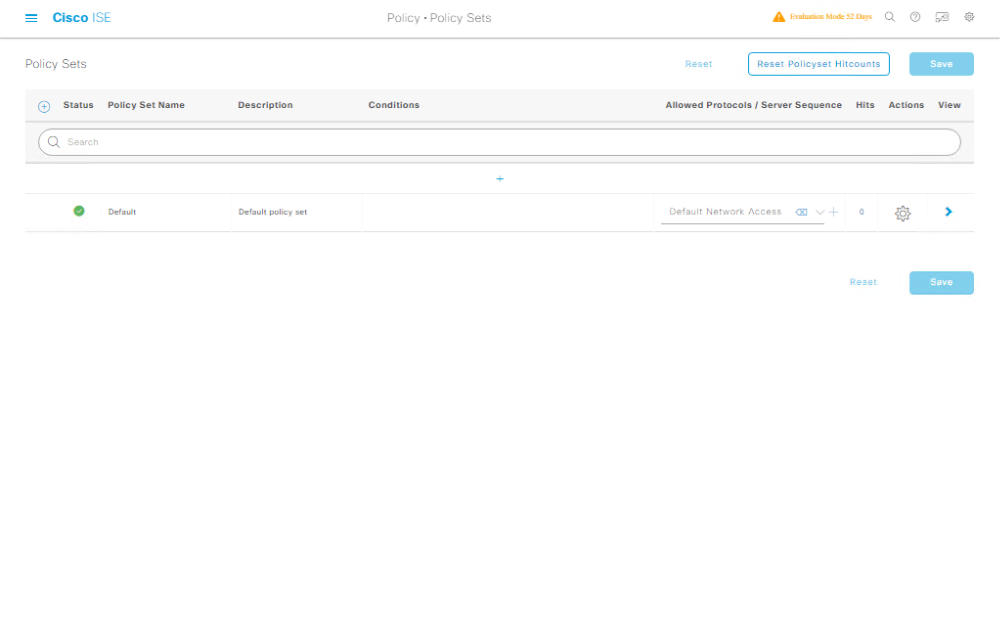
Step 6 — Update Policy Set to Use Internal Users (Authentication & Authorization)
- GUI: Policy → Policy Sets → open your Policy Set (e.g.,
DefaultorLab_Policy).
[Screenshot: Policy → Policy Sets]
- Authentication Policy:
- Add rule: If
Network AccessCondition (e.g., Called-Station-Id or Wired) → Then use Identity Source Sequence =LocalFirst. - Ensure EAP/PEAP settings are correct if testing 802.1X.
- Add rule: If
- Authorization Policy:
- Add rule: Condition:
Identity Group→ Internal:Lab_Students (orAuthenticated Identity: Member Of→ selectLab_Students) - Result:
Permit-Lab-Access-VLAN100 - Save policy.
- Add rule: Condition:
Validation (GUI): Policy shows no syntax errors; you can click Test or run an authentication attempt.
Step 7 — Configure Switch (IOS) to use ISE & Enable 802.1X / MAB
On your Catalyst/IOSv-L2 switch, configure RADIUS and a test port:
conf t
radius server ISE
 address ipv4 10.10.10.5 auth-port 1812 acct-port 1813
 key cisco123
!
aaa new-model
aaa group server radius ISE-GROUP
 server name ISE
aaa authentication dot1x default group ISE-GROUP
aaa authorization network default group ISE-GROUP
!
interface GigabitEthernet1/0/5
 switchport mode access
 switchport access vlan 1
 authentication port-control auto
 dot1x pae authenticator
 mab
 spanning-tree portfast
Validation (Switch CLI):
show running-config | section radius— check server config.show authentication sessions interface Gi1/0/5— after client connects, should show auth status.test aaa group radius ISE-GROUP username student01 password StrongP@ss new-code— (if IOS supports) to simulate auth.
Step 8 — Test End-to-End & Validate
1) Trigger authentication: Connect the Windows client (or have a test user connect) to port Gi1/0/5.
2) ISE Live Logs (GUI):
- Go to Operations → RADIUS → Live Logs. Filter by username
student01or by Client IP/interface. You should see an Access-Request → Access-Accept and authorization profilePermit-Lab-Access-VLAN100applied.
[Screenshot: Operations → RADIUS → Live Logs showing student01 Accept]
3) Switch CLI:
show authentication sessions interface Gi1/0/5
Expected: session shows AUTHZ and assigned VLAN or downloadable ACL applied.
4) Additional ISE checks (CLI):
ise/admin# show application status ise
ise/admin# show version
If auth fails: check Live Logs reason, confirm user password, confirm identity source sequence picks Internal, and re-run switch test.
Step 9 — Password Reset & Account Management (GUI)
- Reset password: Administration → Identity Management → Identities → Users → Internal Users → Search
student01→ Edit → New Password → Save.
- Lock/Unlock account: Toggle Enabled/Disabled flag.
Validation: After reset, test login again; Live Logs should show new auth attempt.
Step 10 — Backup & Export Internal Users
ISE stores internal users in its internal DB. Use ISE backup to save configuration and users:
- Administration → System → Backup and Restore → Create a backup job (SFTP/FTP target).
- Export is the supported backup path; don’t rely on hypervisor snapshots for long term.
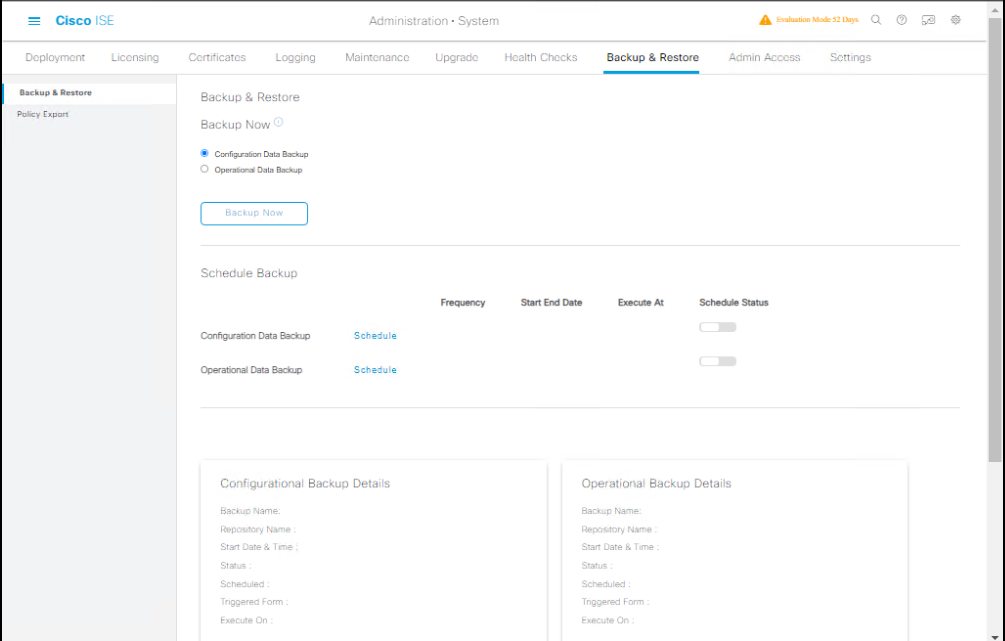
Validation: Confirm backup file exists on repository and contains user DB.
FAQs
1. Can I use internal users for both wired and wireless authentication?
Yes. Internal users work with any authentication method supported by ISE (802.1X, MAB, web authentication). As long as your Policy Set is configured to use the Internal Users identity source, both wired and wireless endpoints can authenticate against them.
2. How do I prioritize Internal Users over Active Directory accounts?
In the Identity Source Sequence, place Internal Users above AD.
- Go to: Administration → Identity Management → Identity Source Sequences
- Move Internal Users to the top.
3. Can I bulk-create Internal Users instead of adding them one by one?
Yes. ISE supports CSV import for mass user creation:
- Menu: Users → Import
- Prepare a CSV with
username,password,description,groupfields.
This is useful in lab testing where you may need 20–50 accounts quickly.
4. How do I assign multiple groups to a single internal user?
In User Edit, you can select more than one User Identity Group.
ISE will match any of those groups when evaluating authorization rules.
5. Can Internal User Groups be used in Authorization Policies?
Absolutely. For example, your policy can say:
If
User Identity Group = Lab-IT-Users→ Assign VLAN 20.
6. How do I validate internal user authentication in ISE?
Use Operations → RADIUS → Live Logs to see successful or failed authentications. Look for:
- User Name matches your test account
- Identity Source = Internal Users
- Authorization Result is as expected
7. Are internal user accounts replicated across ISE nodes?
Yes. In a multi-node deployment, the internal database replicates to all policy service nodes (PSNs), ensuring consistent authentication even if one node fails.
8. Can I set password expiry for internal accounts?
Yes. While creating/editing a user, set a password expiration date. This is helpful if you’re simulating real security policy requirements in your lab.
9. What’s the CLI method to test internal user authentication?
From a switch:
Switch# test aaa group radius <username> <password> legacy
From ISE CLI, you can’t directly authenticate a user, but you can check logs with:
ise/admin# show logging application ise-psc.log tail
10. Are internal users recommended in production?
They are not recommended for large-scale production use except for:
- Emergency fallback accounts
- Admin/service accounts for network devices
Production should rely on AD, LDAP, or external identity stores for scalability.
YouTube Link
For more in-depth Cisco ISE Mastery Training, subscribe to my YouTube channel Network Journey and join my instructor-led classes for hands-on, real-world ISE experience
Closing Notes (Key takeaways)
- Internal users/groups are fast and flexible for labs, guests, and temporary break-glass accounts.
- Always limit privileges for internal accounts and place them in dedicated groups used by narrow authorization rules.
- Use Identity Source Sequence to prefer AD but fall back to Internal for emergency access.
- Validate with Live Logs in the GUI and standard network CLI commands on switches (
show authentication sessions ...) — those are your primary troubleshooting tools. - Backup ISE configuration regularly; internal users are part of the ISE DB and must be included in backups.
Fast-Track to Cisco ISE Mastery Pro
You’re building real, deployable NAC skills — but if you want mentored, job-focused training that turns lab practice into certification and career opportunities, join my live program.
I run a 4-month instructor-led CCIE Security & ISE Mastery program with live labs (VMware ESXi & EVE-NG), graded assignments, 1:1 doubt sessions, and exam-style scenarios.
What you get:
- Weekly live sessions with hands-on lab walkthroughs (including user/group workflows).
- Personalized lab review — submit your topology; get direct feedback.
- Real exam prep and job-readiness coaching (interviews, resumes).
Limited seats to maintain high quality. Submit your details for a free eligibility & lab review call and we’ll recommend the best batch for you.
Reserve your free eligibility call & lab review:
https://course.networkjourney.com/ccie-security/
Enroll Now & Future‑Proof Your Career
Email: info@networkjourney.com
WhatsApp / Call: +91 97395 21088