Trainer Sagar Dhawan
- Posted on
[Day 91] Cisco ISE Mastery Training: TACACS+ Command Authorization
Table of Contents
Introduction
TACACS+ command authorization with Cisco ISE turns your network device CLI into a role-based, centrally audited control surface. Instead of trusting local device accounts or “all-powerful” operators, you’ll authorize every command in real time against policy—per user, per device, per location, per time—while logging each keystroke‐level attempt. Today we’ll build a production-style Device Administration (TACACS+) fabric in ISE that:
- Authenticates device admins (AD/LDAP/Internal).
- Authorizes commands via Command Sets (regex-driven permit/deny).
- Issues shell/privilege attributes (IOS-XE
priv-lvl, NX-OSshell:roles, ASA roles). - Audits who ran what, where, and when (with exec/command/accounting).
- Fails safe with break-glass and HA PSNs.
By the end, you’ll have a working lab plus a repeatable runbook you can drop into customer networks.
Problem Statement
- Local accounts drift and shared passwords ruin accountability.
- Inconsistent privileges across IOS-XE, NX-OS, ASA, WLC → hard to govern.
- Auditors want per-command logs, approvals, and least privilege.
- Ops wants easy role mapping (e.g., AD group → ReadOnly/NetworkOps/NetAdmin).
- Security demands deny-by-default for risky commands (e.g.,
reload,write erase).
Solution Overview
Cisco ISE Device Administration (TACACS+) provides:
- Policy Elements
- Shell Profiles → return
priv-lvl/shell:roles. - Command Sets → regex permit/deny per command and arguments.
- TACACS Profiles → (optional) bundle attributes per platform.
- Shell Profiles → return
- Device Admin Policy Sets → map user + device conditions → Authorization Rules that attach Shell Profile + Command Set.
- Accounting → full exec/command logs for investigations.
- Identity Source Sequences → AD first, fallback to Internal (lab) or local on NAD (break-glass).
Sample Lab Topology
Platform: VMware (ISE PAN/PSN), EVE-NG (NADs), admin jump host (Win10).
Nodes & IPs (example):
- ISE PAN/MnT/pxGrid/Device Admin:
10.10.10.10 - ISE PSN (TACACS+):
10.10.10.11 - Catalyst 9300 (IOS-XE):
10.10.30.30(mgmt SVI) - Catalyst 9800-CL (WLC):
10.10.30.40(GUI/SSH) - NX-OS (vDC/CSR-NX-OS in EVE):
10.10.30.50(optional) - ASA/FTD mgmt:
10.10.30.60(optional) - AD/LDAP:
10.10.20.20 - Admin PC:
10.10.40.10
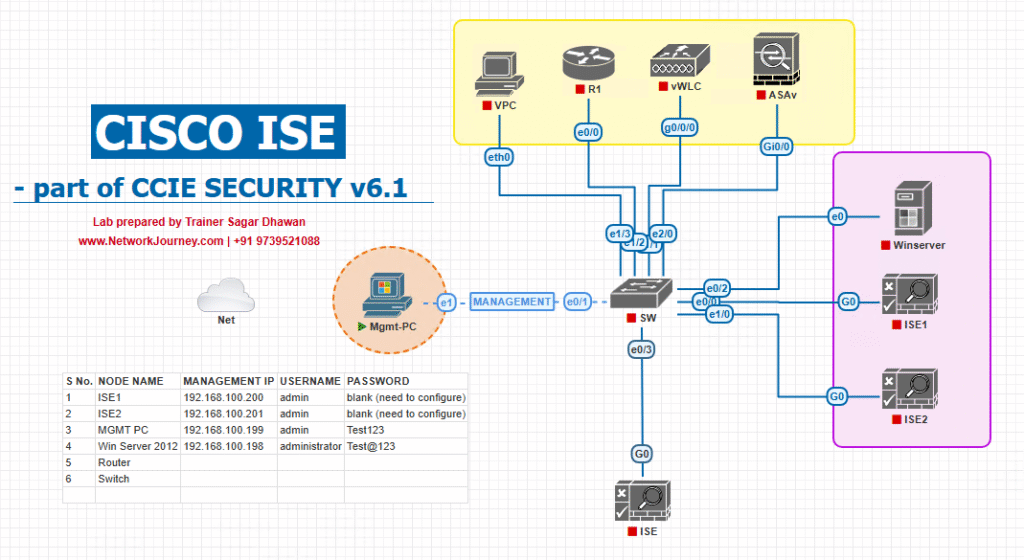
AD Groups (example):
NetOps-RO(read-only),NetOps-NOC(limited change),NetOps-Admin(full admin)
Step-by-Step GUI Configuration Guide (with CLI & validation)
A. ISE Enablement & Pre-Reqs
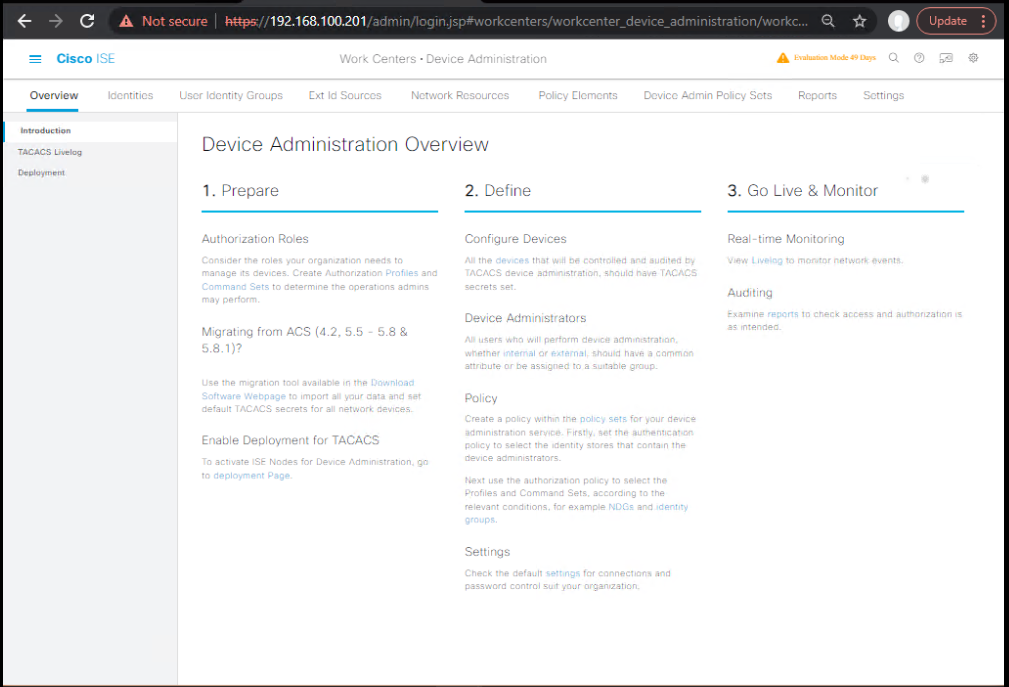
- Enable Device Administration Work Center
- ISE GUI → Work Centers → Device Administration → ensure enabled.
- [Screenshot: ISE Device Administration Work Center]
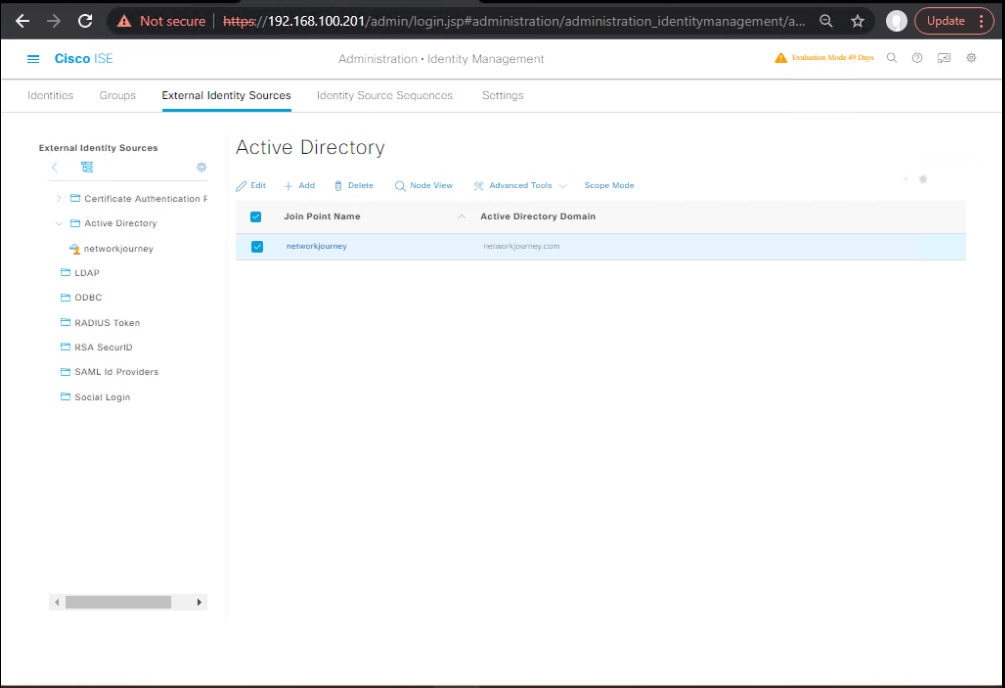
- Join ISE to AD (if using AD)
- Administration → Identity Management → External Identity Sources → Active Directory → Join domain.
- [Screenshot: ISE AD Join Wizard]
- Test: Groups → Add your
NetOps-RO/NOC/Admin. - System Certificates & Time
- Ensure trusted cert on PSN for TACACS+ (optional but recommended).
- Administration → System → Certificates.
- show ntp on CLI and AD/Devices synced.
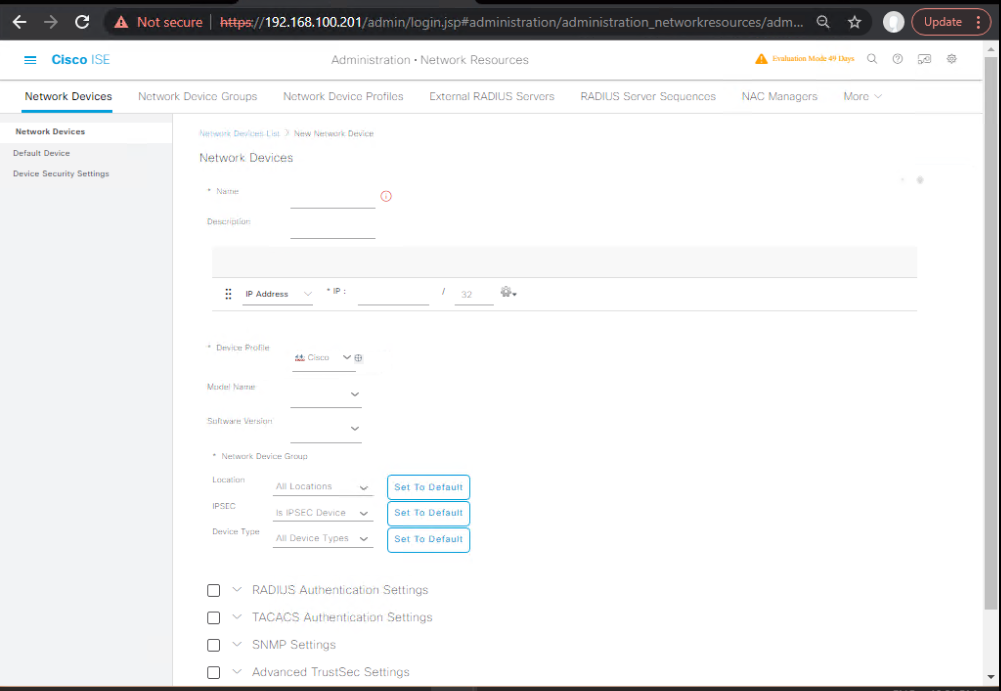
B. Add Network Devices (NADs) for TACACS+
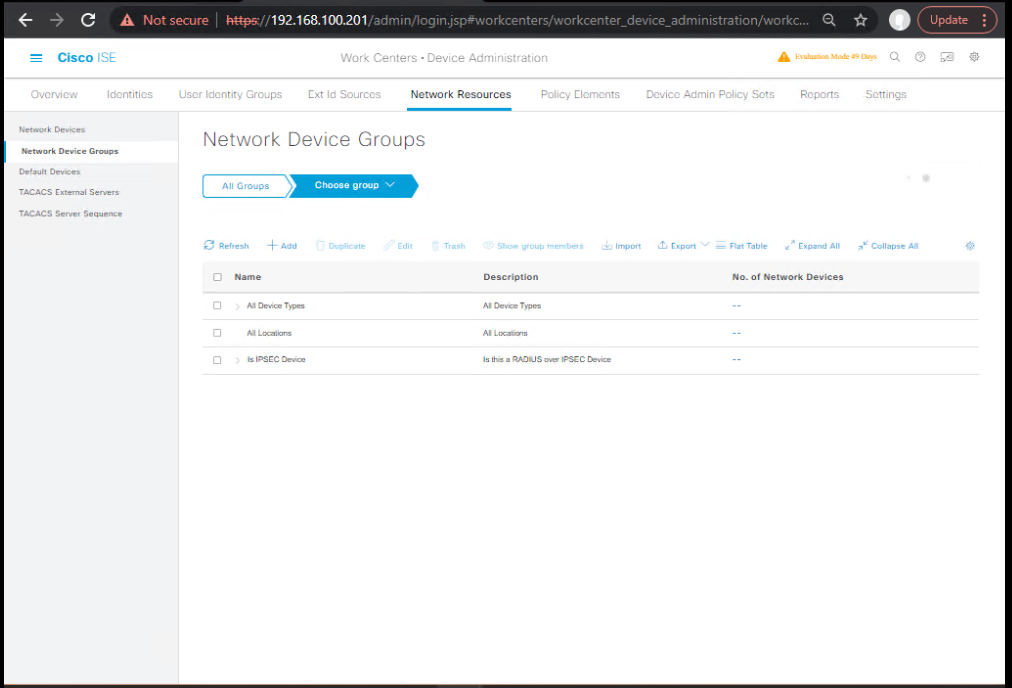
- Create Device Grouping
- Work Centers → Device Administration → Network Resources → Network Device Groups
- Add: Location: Lab, Device Type: Switch/WLC/NX-OS.
- [Screenshot: NDG Creation]
- Add Network Device (example Cat9K)
- Work Centers → Device Administration → Network Resources → Network Devices → Add
- Name:
C9300-LAB - IP:
10.10.30.30 - NDG: Location=Lab, Device Type=Switch
- TACACS Settings: Shared Secret:
TACACS-KEY-123 - [Screenshot: Add NAD with TACACS secret]
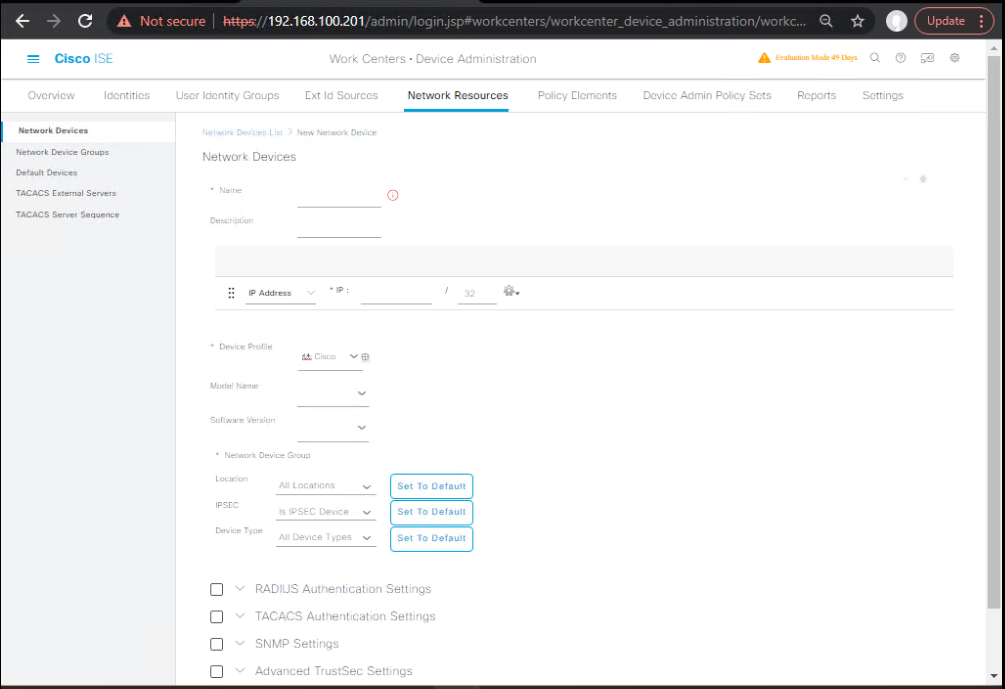
Repeat for WLC/NX-OS/ASA.
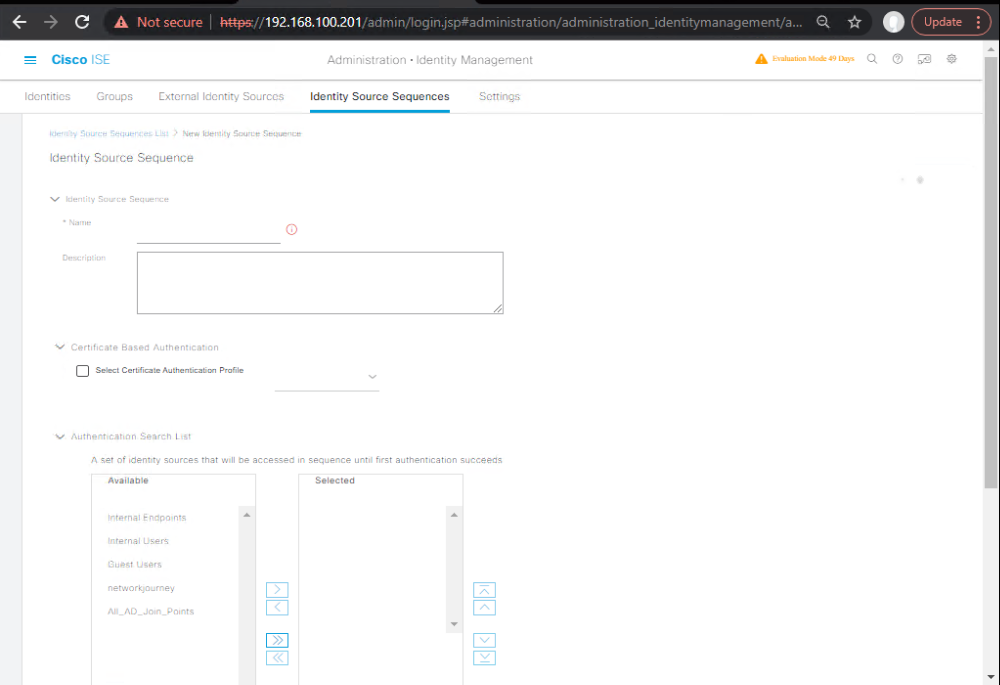
C. Identity Source Sequence (ISS)
- Administration → Identity Management → Identity Source Sequences → Add
- Name:
ISS-AD-Internal - Order: AD (your domain) → Internal Users
- When not found: Continue to next source.
- [Screenshot: Identity Source Sequence]
- Name:
D. Policy Elements – Shell Profiles
Create per-role profiles (IOS-XE/NX-OS/ASA examples).
- Shell Profile – ReadOnly
- Work Centers → Device Administration → Policy Elements → Results → TACACS Profiles → Shell Profiles → Add
- Name:
SP-RO - Common Tasks: Default Privilege =
1 - Advanced Attributes:
cisco-av-pair = priv-lvl=1(IOS-XE)shell:roles = network-operator(NX-OS optional)
- [Screenshot: Shell Profile RO]

- Shell Profile – NOC (Limited Change)
- Name:
SP-NOC→priv-lvl=7 - (NX-OS)
shell:roles = network-operatoror custom role. - [Screenshot: Shell Profile NOC]
- Name:
- Shell Profile – Admin
- Name:
SP-ADMIN→priv-lvl=15 - (NX-OS)
shell:roles = network-admin - (ASA)
cisco-av-pair = shell:roles=admin(platform-specific) - [Screenshot: Shell Profile Admin]
- Name:
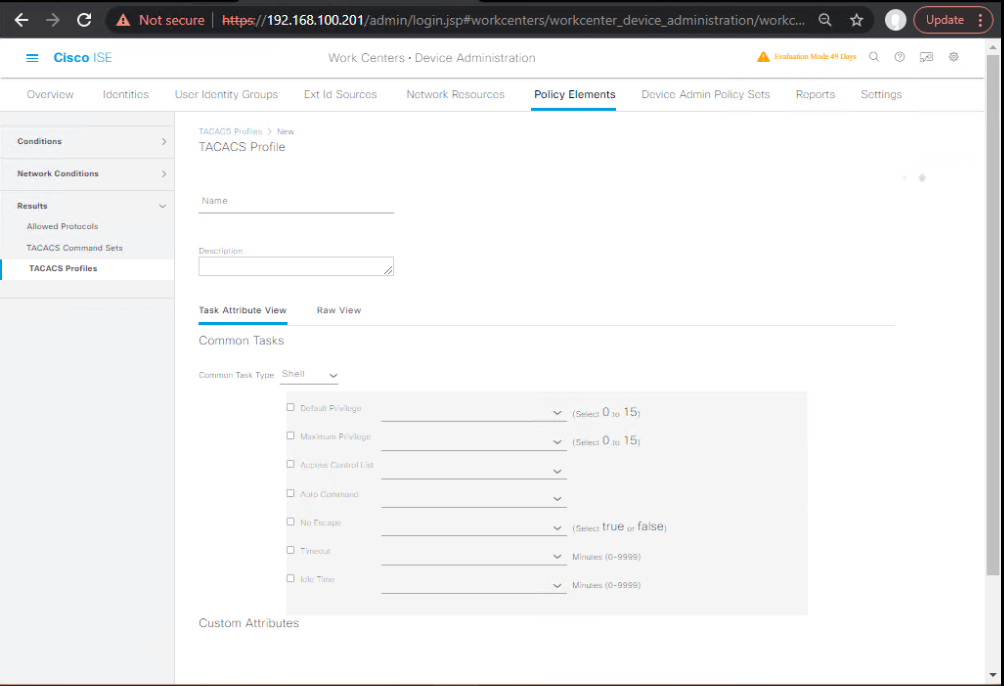
E. Policy Elements – Command Sets (Regex-based Authorization)
Work Centers → Device Administration → Policy Elements → Results → TACACS Profiles → Command Sets
- CS-RO (Read Only)
- Permit:
^show(\s+.*)?$^ping(\s+.*)?$^traceroute(\s+.*)?$
- Deny (explicit):
^configure,^conf,^write,^copy,^reload,^debug,^clear - Unmatched: Deny
- [Screenshot: Command Set RO]
- Permit:
- CS-NOC (Limited Change)
- Permit:
- All from RO plus:
^configure terminal$^interface\s+\S+$^description\s+.*$^ip address\s+.*$(careful—limit with NDG/Device conditions if needed)^no shutdown$/^shutdown$(optional)
- Deny:
^reload,^write erase,^erase,^license,^crypto,^username - [Screenshot: Command Set NOC]
- Permit:
- CS-ADMIN (Full with Guardrails)
- Permit:
^.*$ - Deny (last-line guardrails):
^reload,^debug\s+.*$(optional),^write erase - [Screenshot: Command Set ADMIN]
- Permit:
Regex Tips:
- Anchor with
^and$to avoid partial matches.- Add argument-level patterns (e.g., limit
copy running-config tftp:only).- Test in lab before production.
F. Device Admin Policy Set (Authentication + Authorization)
- Create Device Admin Policy Set
- Work Centers → Device Administration → Policy Sets → Add
- Name:
PS-DeviceAdmin - Condition:
Protocol = TACACSORDevice Type IN [Switch, WLC, NX-OS, ASA] - Identity Source:
ISS-AD-Internal - [Screenshot: Device Admin Policy Set Condition]
- Authorization Rules (top → down)
- Rule 1 – NetOps-Admin
- If
AD-Group = NetOps-Admin→ Shell=SP-ADMIN, CmdSet=CS-ADMIN
- If
- Rule 2 – NetOps-NOC
- If
AD-Group = NetOps-NOC→ Shell=SP-NOC, CmdSet=CS-NOC
- If
- Rule 3 – NetOps-RO
- If
AD-Group = NetOps-RO→ Shell=SP-RO, CmdSet=CS-RO
- If
- Default Rule – DenyAll
- Shell= (optional low priv) or Deny
- [Screenshot: Device Admin Authorization Rules]
- Rule 1 – NetOps-Admin
- Accounting
- Ensure TACACS+ Accounting is enabled to log command events.
- [Screenshot: Enable TACACS Accounting]
G. NAD (Device) CLI Configuration & Validation
1) IOS-XE (Catalyst 9300) – AAA & TACACS+
conf t
!
aaa new-model
!
tacacs server ISE1
 address ipv4 10.10.10.11
 key TACACS-KEY-123
!
aaa group server tacacs+ ISE_TACACS
 server name ISE1
!
ip tacacs source-interface VlanX     ! mgmt SVI
!
aaa authentication login VTY_AUTH group ISE_TACACS local
aaa authorization exec VTY_AUTHZ group ISE_TACACS local
aaa authorization commands 15 VTY_CMDS group ISE_TACACS local
aaa accounting exec VTY_ACCT start-stop group ISE_TACACS
aaa accounting commands 15 VTY_CMDS_ACCT start-stop group ISE_TACACS
!
line vty 0 4
 login authentication VTY_AUTH
 transport input ssh
!
username breakglass privilege 15 secret <STRONG_LOCAL_ONLY>   ! break-glass
end
write mem
Validation (IOS-XE):
test aaa group tacacs+ netops.ro <password> legacy
show aaa servers
show tacacs
debug tacacs events
debug tacacs authorization
terminal monitor
- Attempt
show run(expect permit for RO). - Attempt
conf t(expect deny for RO; permit for NOC/Admin). - Confirm ISE Live Logs show
Command Set Matched.
2) Catalyst 9800-CL (WLC) – TACACS for GUI/SSH
conf t
aaa new-model
tacacs server ISE1
 address ipv4 10.10.10.11
 key TACACS-KEY-123
aaa group server tacacs+ ISE_TACACS
 server name ISE1
!
aaa authentication login HTTP_AUTH group ISE_TACACS local
aaa authorization exec HTTP_AUTHZ group ISE_TACACS local
ip http authentication aaa
ip http secure-server
ip http server
end
- Login to WLC GUI with AD user → ISE should authorize with appropriate shell/role.
- Validate in ISE Live Logs (TACACS) and WLC
show aaa servers.
3) NX-OS (optional)
conf t
tacacs-server host 10.10.10.11 key TACACS-KEY-123
aaa authentication login default group tacacs+ local
aaa authorization commands default group tacacs+ local
aaa accounting default group tacacs+
exit
- Ensure Shell Profile returns
shell:roles=network-operator(RO) ornetwork-admin(Admin). - Validate with
show accounting log,show tacacs, and ISE Live Logs.
H. ISE Validation – Where to Look
- Operations → TACACS → Live Logs → filter by Device IP or Username.
- Columns to check: Service (Device Admin), Action, CmdSet, CmdArgs, Privilege, Result.
- [Screenshot: ISE TACACS Live Logs]
- Operations → Reports → Device Admin → Command Accounting reports.
- [Screenshot: Command Accounting Report]
I. Test Plan Matrix (execute & tick)
| Test | User | Device | Command | Expect | ISE Live Log | NAD CLI log |
|---|---|---|---|---|---|---|
| 1 | netops.ro | Cat9K | show ver | Permit | CmdSet=CS-RO(permit) | accounting ok |
| 2 | netops.ro | Cat9K | conf t | Deny | CmdSet=CS-RO(deny) | authorization failed |
| 3 | netops.noc | Cat9K | conf t | Permit | CmdSet=CS-NOC(permit) | ok |
| 4 | netops.noc | Cat9K | reload | Deny | CS-NOC(deny) | failed |
| 5 | netops.admin | Cat9K | copy run start | Permit | CS-ADMIN(permit) | ok |
| 6 | netops.admin | Cat9K | reload | Deny (guardrail) | CS-ADMIN(deny) | failed |
| 7 | Any | WLC GUI login | N/A | Role mapped | Shell Profile matched | ok |
J. Troubleshooting Quick-Wins
- No TACACS hits in ISE: wrong NAD IP/secret, PSN unreachable, device not added in ISE.
- User authenticated but commands denied: wrong Command Set order or regex too strict; verify Authorization Rule matched AD group.
- Priv-lvl wrong on IOS-XE: Shell Profile missing
cisco-av-pair=priv-lvl=15. - NX-OS ignores privileges: use
shell:roles(notpriv-lvl). - Timeouts: increase
tacacs server timeout 10and set source-interface. - Accounting empty: ensure
aaa accounting commands 15 ...is configured and TACACS accounting enabled in ISE.
Step-by-Step Lab Tasks
Task 1 – Enable TACACS+ in ISE
- Navigate: Administration > System > Deployment
- Enable TACACS+ Service.
[Screenshot: ISE Enable TACACS+ Screen] - Restart Application Services.
Validation CLI (ISE):
ise/admin# show application status ise | include tacacs
ise/admin# netstat -an | grep 49
Task 2 – Add Network Device
- Navigate: Administration > Network Resources > Network Devices.
- Add Switch/Router with:
- Name:
SW1 - IP:
192.168.1.10 - TACACS+ Shared Secret:
CISCO123
[Screenshot: Add Network Device Screen]
- Name:
Validation CLI (Switch):
SW1# test aaa group tacacs+ admin Cisco123 legacy
Task 3 – Configure Device Admin Policy Set
- Navigate: Policy > Policy Sets > Device Administration.
- Add Policy Set:
TACACS Device Admin. - Conditions:
Device Type == Switch. - Allowed Protocols:
Default Device Admin.
[Screenshot: Policy Set Config]
Validation: Confirm policy hit in Live Logs.
Task 4 – Define TACACS Profiles
- Policy > Policy Elements > Results > TACACS Profiles.
- Create:
- Full-Admin: Privilege 15.
- Read-Only: Privilege 1.
[Screenshot: TACACS Profile Creation]
Task 5 – Map Users to TACACS Profiles
- Identity Groups: Create
NetAdminsandNetOperators. - Authorization Rules:
- If AD-Group ==
NetAdmins→Full-Admin. - If AD-Group ==
NetOperators→Read-Only.
[Screenshot: Authorization Rules]
- If AD-Group ==
Validation CLI (Switch):
SW1# show privilege
SW1# show accounting log
Task 6 – Test Command Authorization
- Login with
NetAdminaccount →configure terminalworks. - Login with
NetOperatoraccount →configure terminaldenied.
Validation in ISE Logs:
Operations > TACACS Live Logs.
Troubleshooting Workbook Section
| Issue | Symptom | Fix |
|---|---|---|
| Wrong Shared Secret | Auth fails, log: Invalid TACACS secret | Re-enter secret on switch & ISE |
| Policy not hit | User gets default deny | Check Policy Set conditions |
| Privilege not applied | User logs in with level 1 | Check TACACS Profile mapping |
| ISE TACACS service down | No AAA response | CLI: show application status ise |
FAQs on TACACS+ Command Authorization in Cisco ISE
FAQ 1: What is the difference between TACACS+ Authentication, Authorization, and Accounting (AAA) in ISE?
- Authentication: Verifies who the user is (e.g., username/password checked against ISE or AD).
- Authorization: Determines what the user can do after login (e.g., full admin vs read-only commands).
- Accounting: Tracks what was done (command history, executed vs denied).
In ISE, this is enforced using TACACS profiles, shell profiles, and command sets.
FAQ 2: How does ISE differentiate between Full Admin and Read-Only users?
- ISE maps users to Active Directory groups or local ISE identity groups.
- Each group is bound to a TACACS Profile (privilege level 15 = full admin, privilege level 1 = read-only).
- Additionally, Command Sets define permitted or denied commands.
Example:
- AD group
NetAdmins→ Full-Admin TACACS Profile (priv 15). - AD group
HelpDesk→ Read-Only TACACS Profile + deny “configure terminal”.
FAQ 3: Can I restrict specific commands for certain users?
Yes.
- Use Command Sets in ISE.
- Example: Allow
showcommands, denyconfigure. - When a user attempts a denied command, ISE logs “Authorization Failure” in TACACS Live Logs.
FAQ 4: How do I test TACACS+ configuration from the switch without waiting for a user login?
Use the CLI command:
test aaa group tacacs+ admin Cisco123 legacy
- If successful → Switch receives an authorization response.
- If failed → Check debug logs + ISE Live Logs.
FAQ 5: How can I see which commands a user executed on a switch?
- Enable TACACS+ Command Accounting on the switch:
aaa accounting commands 0 default group tacacs+
aaa accounting commands 15 default group tacacs+
- In ISE → Operations > Reports > TACACS Accounting shows each executed command with timestamp.
FAQ 6: What happens if ISE is unreachable?
- If you configure
aaa authentication login default group tacacs+ local, the switch will fall back to local users if ISE is down. - Best practice: Keep at least one local emergency admin account configured.
FAQ 7: Why are my TACACS+ requests failing with “Invalid shared secret”?
- Shared secret mismatch between ISE Network Device object and switch TACACS+ config.
- Fix → Re-enter the same TACACS key on both sides.
CLI check on switch:
show run | include tacacs-server key
FAQ 8: Can I integrate TACACS+ in ISE with Active Directory for user authentication?
Yes.
- ISE acts as a TACACS+ server.
- Authentication request is proxied to AD.
- Authorization is mapped via AD group membership.
Example: Domain Admins→ Full Admin TACACS profile.Network Operators→ Read-Only TACACS profile.
FAQ 9: Where do I check TACACS+ debug logs in ISE?
- GUI: Operations > TACACS Live Logs (real-time login/command results).
- CLI:
ise/admin# less /var/log/ise/tacacs.log
ise/admin# grep TACACS /var/log/ise/ise-psc.log
FAQ 10: How do I verify that command authorization is working correctly?
- Login with a Read-Only user.
- Try
show running-config→ Should work. - Try
configure terminal→ Should fail. - Validate in:
- Switch CLI:
debug aaa authorizationshows “Not Authorized”. - ISE GUI: Live Logs show “Command denied”.
- Switch CLI:
This confirms that ISE TACACS+ is correctly enforcing policies.
YouTube Link
For more in-depth Cisco ISE Mastery Training, subscribe to my YouTube channel Network Journey and join my instructor-led classes for hands-on, real-world ISE experience
Closing Notes
You’ve built a complete TACACS+ Device Admin stack: AD-backed identity, role-aware Shell Profiles, regex Command Sets, platform-correct attributes, and full accounting. You can now enforce least-privilege at scale, pass audits, and maintain control during outages with smart fallback.
Upgrade Your Skills – Start Today
“For more in-depth Cisco ISE Mastery Training, subscribe to my YouTube channel Network Journey and join my instructor-led classes.”
Fast-Track to Cisco ISE Mastery Pro
I run a focused 4-month instructor-led program taking you from NAC fundamentals → TrustSec → pxGrid → Automation → Device Admin with production-grade labs and job-ready runbooks.
Full outline & enrollment: https://course.networkjourney.com/ccie-security/.
What you’ll build: multi-PSN HA TACACS, per-platform Shell Profiles, advanced Command Sets, SIEM integration, and automated response playbooks.
Enroll Now & Future‑Proof Your Career
Email: info@networkjourney.com
WhatsApp / Call: +91 97395 21088