Trainer Sagar Dhawan
- Posted on
[Day 92] Cisco ISE Mastery Training: Customizing TACACS+ Shell Profiles
Table of Contents
Introduction
In Cisco ISE Device Administration (TACACS+), the Shell Profile is the authority that decides what execution context the admin receives at login—their privilege level, role(s), and any vendor-specific attributes the device needs to correctly shape the session. If Command Sets are your surgical “allow/deny” blades, Shell Profiles are the gravity wells that pull a user into the correct universe (IOS-XE priv-lvl, NX-OS shell:roles, ASA privilege model, WLC/IOS-XE GUI roles, etc.).
Today we’ll build platform-specific, reusable, and auditable Shell Profiles and bind them into Authorization Rules so your admins land with the right privilege/role, every time—across mixed fleets (Catalyst IOS-XE, NX-OS, ASA/FTD console, 9800 WLC).
Problem Statement
- One size doesn’t fit all: IOS-XE cares about
priv-lvl, NX-OS requiresshell:roles, ASA has its own privilege tiers; returning the wrong attribute = wrong access. - Role drift & inconsistency: AD group “NetOps-Admin” should map to equivalent power on all platforms, but default Shell Profiles don’t translate automatically.
- Audit & compliance: Auditors expect deterministic, human-readable mapping “AD Group → Role/Priv → Command Guardrails”.
- Operational risk: Mis-mapped Shell Profiles cause over-privileged admins (dangerous) or under-privileged staff (tickets, delays).
Solution Overview
- Use separate Shell Profiles per platform + role (e.g.,
SP-IOSXE-ADMIN,SP-NXOS-OPERATOR,SP-ASA-ADMIN). - Return native attributes:
- IOS-XE / classic IOS / 9800 WLC CLI →
cisco-av-pair=priv-lvl=1…15(or ISE “Default Privilege” set to 1/15). - NX-OS →
shell:roles=network-adminornetwork-operator(can be comma-separated for multiple roles). - ASA →
priv-lvl=1…15(TACACS command auth must be enabled on ASA).
- IOS-XE / classic IOS / 9800 WLC CLI →
- Bind Shell Profiles with Authorization Rules using AD group + Network Device Group (NDG:Device Type) to send the right attributes to the right device.
- Pair with Command Sets for least-privilege command control + Accounting for per-command audit.
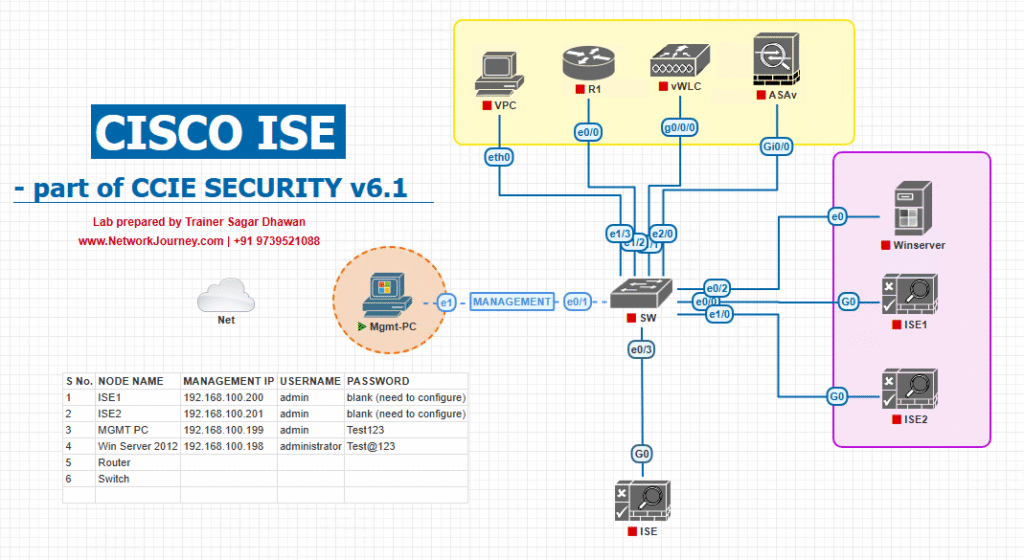
Sample Lab Topology
Platform: VMware (ISE PAN/MnT + PSN), EVE-NG (NADs), Windows 10 Admin VM.
Nodes (example):
- ISE PAN/MnT/PSN:
10.10.10.10(PAN/MnT),10.10.10.11(PSN Device Admin) - Catalyst 9300 (IOS-XE):
10.10.30.30 - NX-OS vSwitch:
10.10.30.50 - 9800-CL WLC (IOS-XE):
10.10.30.40 - ASA (optional):
10.10.30.60 - AD/LDAP:
10.10.20.20 - Admin PC:
10.10.40.10
AD Groups:
NetOps-Admin(Full admin)NetOps-NOC(Operator)NetOps-RO(Read-only)
Topology Diagram :
Step GUI Configuration Guide (with CLI + validation)
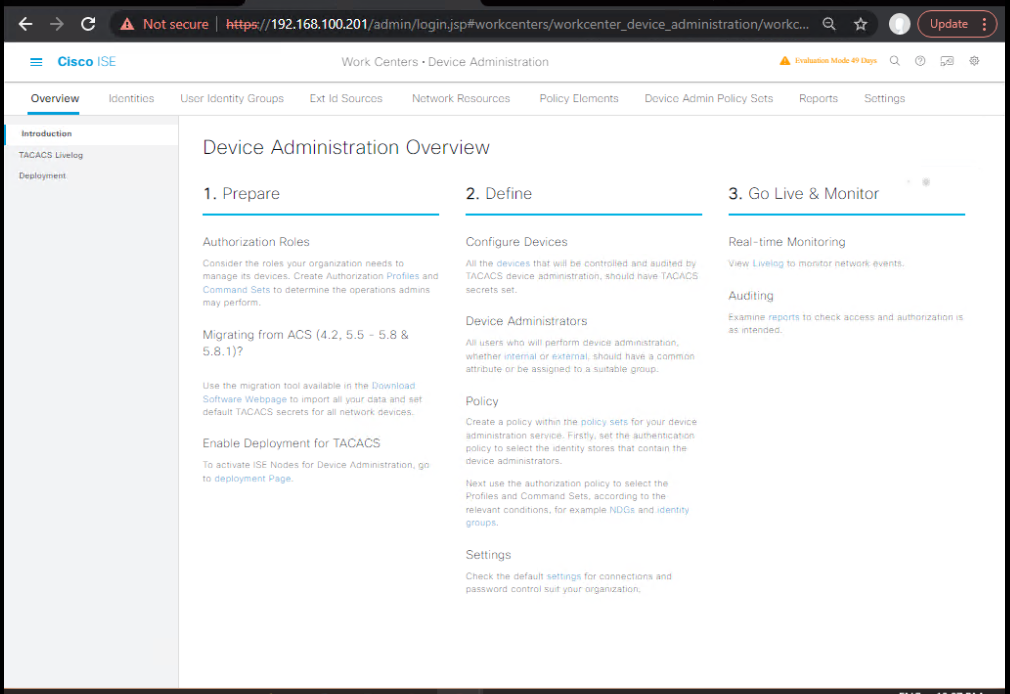
A) Enable Device Admin & Add NADs
- Enable Device Administration
- ISE GUI → Work Centers → Device Administration (ensure enabled).
- [Screenshot: ISE Device Administration enablement]
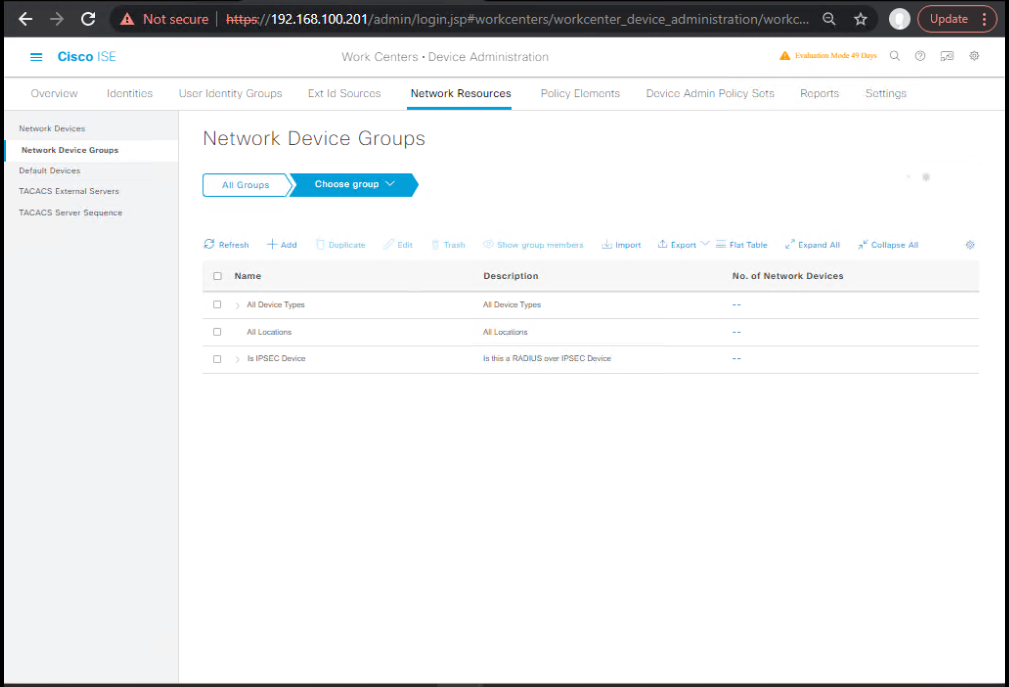
- Add Network Device Groups (NDG)
- Work Centers → Device Administration → Network Resources → Network Device Groups
- Create: Device Type:
IOSXE,NXOS,ASA,WLC. Location:LAB. - [Screenshot: NDG Creation]
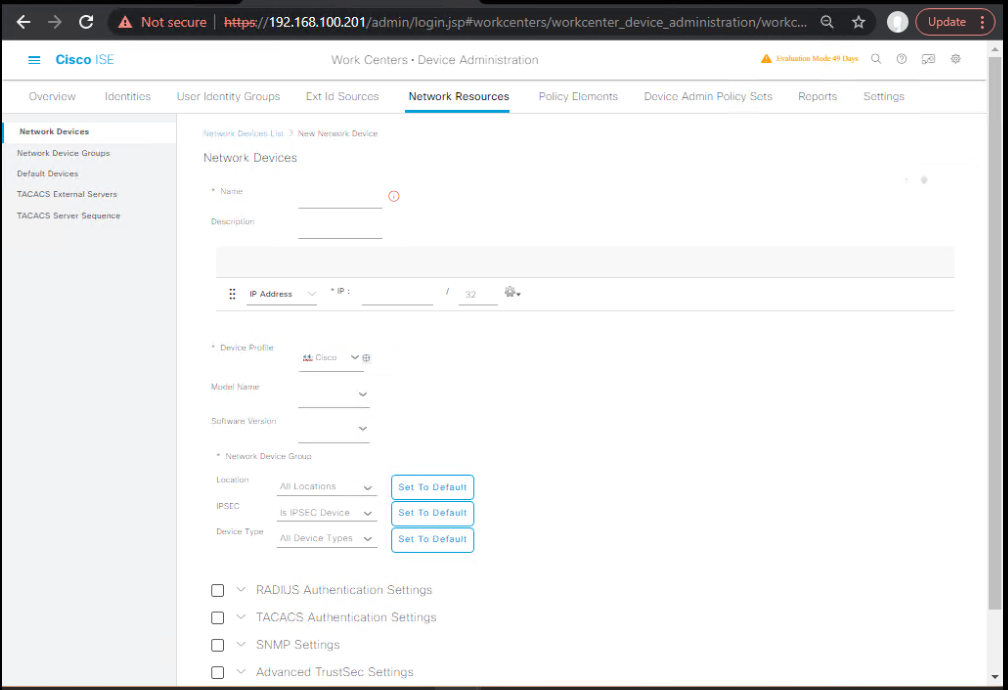
- Add NADs
- … → Network Devices → Add → set Name, IP, NDG:Device Type, TACACS+ shared secret.
- [Screenshot: Add Network Device with TACACS settings]
B) Identity Source Sequence (AD→Internal fallback)
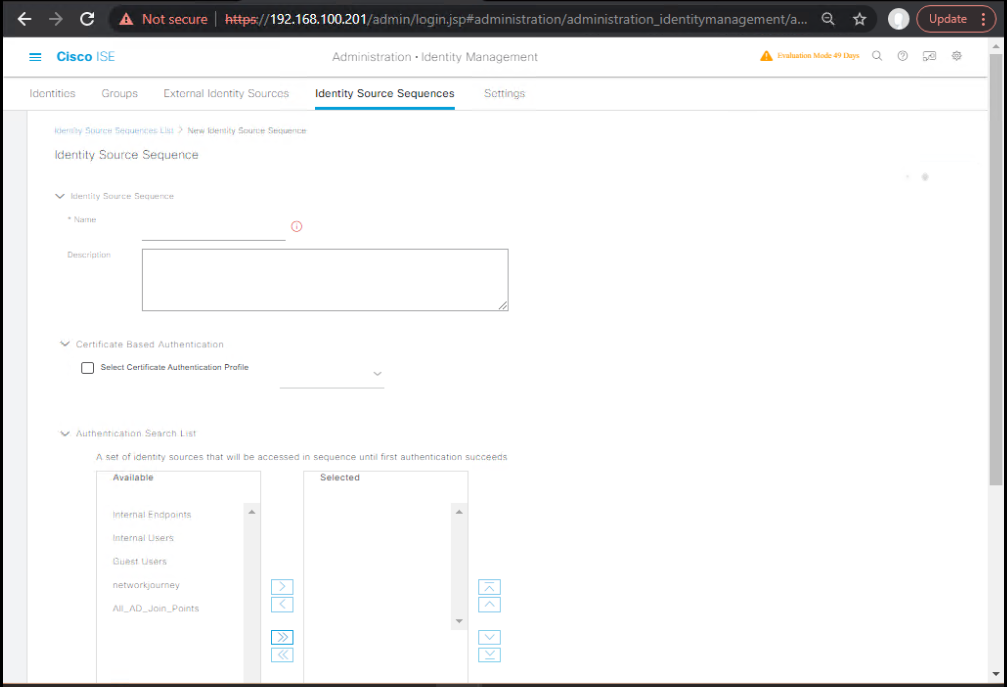
- Create ISS
- Administration → Identity Management → Identity Source Sequences → Add
- Name:
ISS-AD-Internal→ Order:Active DirectorythenInternal Users. - [Screenshot: ISS Config]
C) Build Shell Profiles (per platform + role)
Why split by platform? Returning
shell:rolesto IOS-XE orpriv-lvlto NX-OS won’t work. Bind the correct attributes for each device family.
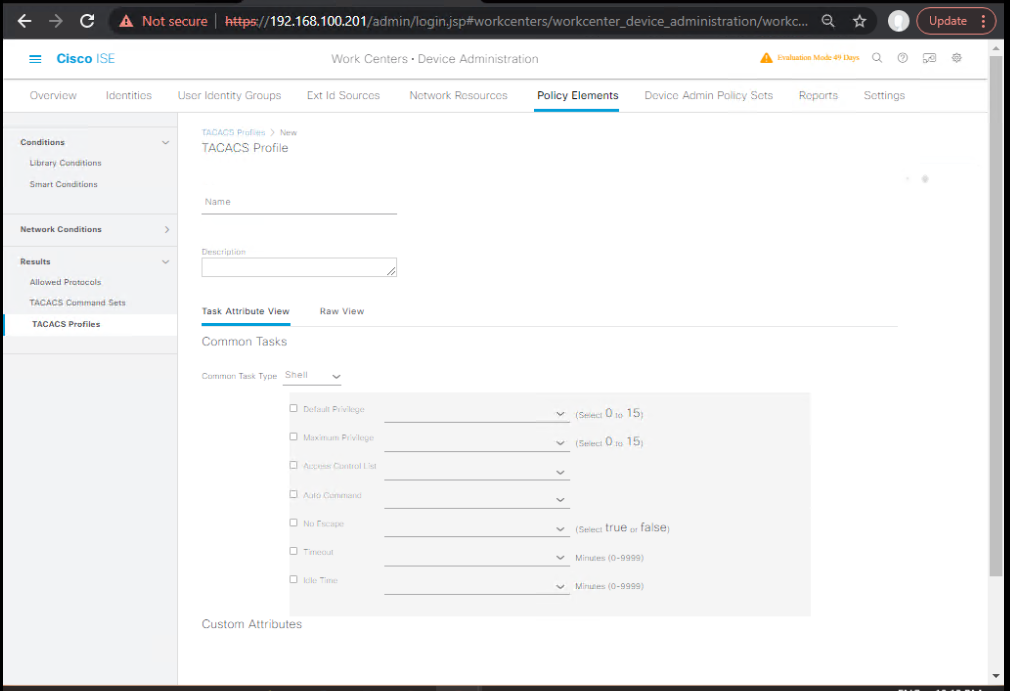
- IOS-XE Shell Profiles
- Work Centers → Device Administration → Policy Elements → Results → TACACS Profiles → Shell Profiles → Add
- SP-IOSXE-ADMIN
- Default Privilege:
15 - Advanced Attributes (optional redundancy):
cisco-av-pair = priv-lvl=15
- Default Privilege:
- SP-IOSXE-NOC
- Default Privilege:
7 cisco-av-pair = priv-lvl=7
- Default Privilege:
- SP-IOSXE-RO
- Default Privilege:
1 cisco-av-pair = priv-lvl=1
- Default Privilege:
- [Screenshot: Shell Profile – IOS-XE Admin]
- NX-OS Shell Profiles
- SP-NXOS-ADMIN
- Advanced Attributes:
shell:roles = network-admin
- Advanced Attributes:
- SP-NXOS-OPERATOR
shell:roles = network-operator
- SP-NXOS-RO
shell:roles = network-operator(operator is RO-ish; pair with Command Set to fully restrict).
- [Screenshot: Shell Profile – NX-OS Admin]
- SP-NXOS-ADMIN
- ASA Shell Profiles (if using ASA)
- SP-ASA-ADMIN →
cisco-av-pair = priv-lvl=15 - SP-ASA-OPERATOR →
cisco-av-pair = priv-lvl=7 - SP-ASA-RO →
cisco-av-pair = priv-lvl=1 - [Screenshot: Shell Profile – ASA Admin]
- SP-ASA-ADMIN →
- (Optional) WLC/IOS-XE GUI alignment
- For 9800-CL, CLI access uses IOS-XE
priv-lvl. For GUI role mapping, keep privilege consistent and apply Command Sets to govern changes via CLI. - [Screenshot: Shell Profile – WLC Operator]
- For 9800-CL, CLI access uses IOS-XE
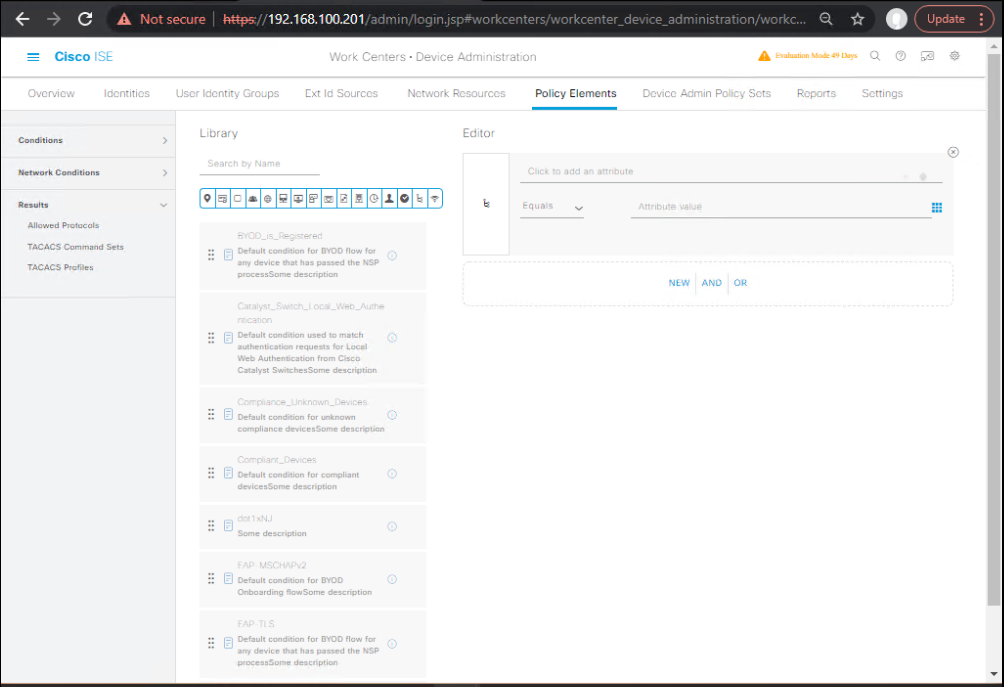
D) Command Sets (complement Shell Profiles)
- Work Centers → Device Administration → Policy Elements → Results → Command Sets → Add
- CS-RO → Permit
^show(\s+.*)?$,^ping(\s+.*)?$,^traceroute(\s+.*)?$; Deny^conf,^configure,^write,^reload,^debug,^clear - CS-NOC → Permit RO +
^configure terminal$,^interface\s+\S+$,^description\s+.*$; Deny high-risk (reload/erase/license/crypto/username…). - CS-ADMIN → Permit
^.*$with guardrail denies (e.g.,^reload$) for safety. - [Screenshot: Command Set – RO/NOC/ADMIN]
- CS-RO → Permit
E) Device Admin Policy Set
- Create Policy Set
- Work Centers → Device Administration → Policy Sets → Add
- Name:
PS-DeviceAdmin - Condition:
Protocol == TACACS - Allowed Protocols: Default Device Admin
- Identity Source:
ISS-AD-Internal - [Screenshot: Policy Set Conditions]
- Authorization Rules (order matters)
- Rule 1: If
NDG:Device Type == IOSXEANDAD-Group CONTAINS NetOps-Admin→ Shell:SP-IOSXE-ADMIN+ Command Set:CS-ADMIN - Rule 2: If
NDG:Device Type == IOSXEANDAD-Group CONTAINS NetOps-NOC→ SP-IOSXE-NOC +CS-NOC - Rule 3: If
NDG:Device Type == IOSXEANDAD-Group CONTAINS NetOps-RO→ SP-IOSXE-RO +CS-RO - Repeat three rules each for NXOS and ASA using platform-specific Shell Profiles.
- Default: Deny or minimal privilege.
- [Screenshot: Authorization Rules Matrix]
- Rule 1: If
- Accounting
- Enable TACACS command accounting in the Policy Set.
- [Screenshot: Enable TACACS Accounting]
F) NAD (device) CLI & validation
IOS-XE (Cat9K)
conf t
aaa new-model
!
tacacs server ISE1
 address ipv4 10.10.10.11
 key TACACS-KEY-123
!
aaa group server tacacs+ ISE_TACACS
 server name ISE1
!
ip tacacs source-interface VlanMgmt
!
aaa authentication login VTY_AUTH group ISE_TACACS local
aaa authorization exec  VTY_AUTHZ group ISE_TACACS local
aaa authorization commands 15 VTY_CMDS group ISE_TACACS local
aaa accounting exec       VTY_ACCT start-stop group ISE_TACACS
aaa accounting commands 15 VTY_CMDS_ACCT start-stop group ISE_TACACS
!
line vty 0 4
 login authentication VTY_AUTH
 transport input ssh
!
username breakglass privilege 15 secret <STRONG_LOCAL>
end
write mem
Validate (IOS-XE):
test aaa group tacacs+ netops.ro <password> legacy
show aaa servers
show tacacs
debug tacacs events
debug tacacs authorization
terminal monitor
show privilege
NX-OS
conf t
tacacs-server host 10.10.10.11 key TACACS-KEY-123
aaa authentication login default group tacacs+ local
aaa authorization commands default group tacacs+ local
aaa accounting default group tacacs+
exit
show tacacs
show accounting log
Expect ISE to return shell:roles=network-admin or network-operator per rule.
ASA (optional)
aaa-server ISE-TACACS protocol tacacs+
aaa-server ISE-TACACS (mgmt) host 10.10.10.11 key TACACS-KEY-123
aaa authentication ssh console ISE-TACACS LOCAL
aaa authorization command ISE-TACACS LOCAL
aaa accounting command ISE-TACACS
show aaa-server
Expect ISE to return priv-lvl based on Shell Profile; ASA will perform command authorization.
G) End-to-End Test Matrix (execute & tick)
| Test | Device | User (AD Group) | Expected Shell | Quick CLI Check | ISE Validation |
|---|---|---|---|---|---|
| 1 | IOS-XE | netops.ro (RO) | priv-lvl=1 | show privilege → 1; conf t denied | Live Logs: SP-IOSXE-RO + CS-RO |
| 2 | IOS-XE | netops.noc (NOC) | priv-lvl=7 | conf t OK; reload denied | SP-IOSXE-NOC + CS-NOC |
| 3 | IOS-XE | netops.admin (Admin) | priv-lvl=15 | conf t OK; copy run start OK | SP-IOSXE-ADMIN + CS-ADMIN |
| 4 | NX-OS | netops.ro | shell:roles=network-operator | limited cmds; show role | SP-NXOS-RO |
| 5 | NX-OS | netops.admin | shell:roles=network-admin | full cmds; guardrails deny reload | SP-NXOS-ADMIN |
| 6 | ASA | netops.ro | priv-lvl=1 | config denied | SP-ASA-RO |
Troubleshooting:
1. Common Issues & Fixes
| Issue | Symptom | Root Cause | Fix / Validation |
|---|---|---|---|
| Shell Profile not applied | User logs in, but default privilege level (1) given instead of configured level | Shell Profile not linked to Authorization Policy | Go to Policy > Device Admin > Policy Sets → Ensure correct Authorization Policy → Map Shell Profile. Validate with [Screenshot: ISE Policy Set Shell Profile Mapping]. |
| Wrong privilege level (e.g., 1 instead of 15) | User logged into router/switch only gets basic commands | Incorrect Priv-lvl attribute in Shell Profile | Edit Shell Profile → Add priv-lvl=15 under custom attributes → Save & re-test. CLI: debug tacacs on switch. |
| Authorization passed but commands denied | User logged in, but certain commands rejected | Shell Profile allows login level, but Command Set not assigned | Verify Command Sets in ISE → Map to Authorization Policy along with Shell Profile. |
| Duplicate Shell Profiles in ISE | Two profiles with similar names confuse mapping | Misconfigured duplicates in GUI | Clean up: Delete duplicates → Reapply correct one in policy. |
| ISE Logs show “Authorization failed” | User login rejected | Policy conditions mismatch (AD group, user attribute) | Go to Operations > TACACS > Live Logs. Verify matching conditions. CLI: show aaa sessions on switch. |
| Device not sending TACACS+ request | No logs in ISE | Device AAA config missing TACACS+ or wrong key | Check switch/router config: aaa new-modeltacacs-server host <ISE-IP> key <KEY>aaa authentication login default group tacacs+ |
| ISE Policy Set not triggered | No hit in TACACS+ Policy | Device IP not in Network Device list or missing TACACS+ shared secret | Check Administration > Network Devices. Ensure correct IP, SNMP/TACACS+ shared secret. |
| Users from AD not matched | Login rejected | AD join issue | In ISE: Administration > Identity Sources > Active Directory → Run Test Join. |
| ISE Down / Backup not working | Device falls back to local login | AAA method list not configured with local fallback | On device: aaa authentication login default group tacacs+ local |
| Slow logins | TACACS+ login takes several seconds | Latency / DNS issue | Verify latency with ping <ISE-IP> and DNS resolution. Use ISE node closer to device. |
2. CLI Debug Commands (on Network Device)
Run these on IOS/IOS-XE/IOS-XR devices:
debug aaa authentication
debug aaa authorization
debug tacacs
Look for lines showing:
- Which TACACS+ server was queried
- Privilege level returned (
priv-lvl=15) - Command authorization result (Permit/Deny)
3. ISE Log Validation
Path:Operations > TACACS > Live Logs
Check:
- User identity (AD/local)
- Device IP
- Policy Set hit
- Authorization result (Permit/Deny)
- Shell Profile name applied
4. Step-by-Step Troubleshooting Flow
- Verify AAA on Device
- Ensure TACACS+ servers configured correctly
- Test fallback with local user
- Check ISE Live Logs
- Does the request reach ISE? If not → AAA issue
- If yes, check Policy hit & Authorization profile
- Validate Shell Profile Mapping
- Is Shell Profile assigned in the correct Authorization Rule?
- Validate Attributes
- Inside Shell Profile, ensure
priv-lvl=15or custom attributes are correctly set.
- Inside Shell Profile, ensure
- Re-test Login & Commands
- Login with test user
- Run privileged commands (
show run,conf t) - Confirm authorization passes
5. Quick Lab Validation Checklist
- TACACS+ configured on device with correct key
- Device registered in ISE under Network Devices
- User account exists (AD/Local)
- Shell Profile created & mapped to Policy Set
- Command Sets applied if needed
- Logs confirm privilege level returned
FAQs – Customizing TACACS+ Shell Profiles
1. What is the role of a Shell Profile in TACACS+ with Cisco ISE?
Answer:
A Shell Profile defines what privilege level (0–15) and what custom attributes a user receives when they log into a network device. Without it, users may only get basic access (priv-level 1).
- Example: A Shell Profile can grant
priv-lvl=15to a Network Admin group, while a Helpdesk group may only getpriv-lvl=5.
Validation:
- GUI: Go to Policy > Device Admin > Shell Profiles → Check attributes.
- CLI: Log in with the user and run
show privilege.
2. How do Shell Profiles differ from Command Sets in ISE?
Answer:
- Shell Profiles: Decide the privilege level and session attributes (environment variables).
- Command Sets: Define what commands are permitted or denied at that privilege level.
Validation Tip: Even with priv-lvl=15, if the Command Set blocks conf t, the user cannot configure the device.
3. Can I assign multiple Shell Profiles to a user?
Answer:
No. A single Authorization Policy Rule in ISE applies exactly one Shell Profile to the user’s session. If multiple rules match, only the first hit (top-down order) applies.
Best Practice: Create distinct rules for each AD group or role.
4. How do I map an AD group to a specific Shell Profile?
Answer:
- Integrate ISE with AD (Administration > Identity Sources > Active Directory).
- In Policy Sets > Device Admin, create an Authorization Rule where:
- Condition = AD group membership (e.g.,
Domain Users: NetworkAdmins). - Result = Assign Shell Profile
Admin_Priv15.
- Condition = AD group membership (e.g.,
Validation:
- GUI: Check Live Logs > TACACS+ → Authorization rule hit.
- CLI: User login →
show privilege.
5. Why does my Shell Profile not apply, and users always get priv-lvl 1?
Answer:
- Policy set may not be matching.
- Shell Profile not mapped in the Authorization Policy.
- Wrong identity source used.
Fix:
- Check Live Logs to confirm which policy rule was hit.
- Reorder policy rules to ensure the correct one matches.
6. Can I create custom attributes inside Shell Profiles?
Answer:
Yes. Cisco ISE allows you to define attributes such as:
priv-lvl=15(common)idle-timeout=600(custom session timeout)cmd=show(allow specific commands if integrated with Command Sets)
GUI: Inside Shell Profile → Custom Attributes → Add new key-value.
Validation: Device debugs (debug tacacs) show which attributes are received.
7. What’s the difference between Shell Profiles for IOS vs. ASA vs. NX-OS?
Answer:
- IOS/IOS-XE: Standard
priv-lvlattribute works. - NX-OS: Uses roles (e.g.,
network-admin,network-operator) instead of privilege levels. ISE Shell Profile must sendrole=network-admin. - ASA: Uses privilege levels + command authorization.
Validation: Test with different devices and verify behavior with show privilege (IOS), show role (NX-OS), show curpriv (ASA).
8. How do I troubleshoot Shell Profile mismatches?
Answer:
- On device: Run
debug tacacs→ Check what ISE sends. - On ISE: Operations > TACACS > Live Logs → Check Shell Profile applied.
- Ensure Network Device config in ISE has correct TACACS+ shared secret.
Checklist:
- Is device registered in ISE?
- Is policy rule hit?
- Is Shell Profile mapped?
9. Can I use fallback Shell Profiles if ISE is unavailable?
Answer:
No. If ISE is down, the device falls back to local user accounts (if configured). Shell Profiles are only applied if ISE responds.
Device Config Best Practice:
aaa authentication login default group tacacs+ local
aaa authorization exec default group tacacs+ local
This ensures admins can log in locally if ISE is unavailable.
10. How do I validate that the correct Shell Profile is applied?
Answer:
- GUI Validation:
- Go to Operations > TACACS > Live Logs → Confirm Authorization Rule and Shell Profile Name.
- CLI Validation (on device):
- Log in with test user.
- Run
show privilege(IOS),show role(NX-OS),show curpriv(ASA). - If configured correctly, it should match the intended Shell Profile.
YouTube Link
For more in-depth Cisco ISE Mastery Training, subscribe to my YouTube channel Network Journey and join my instructor-led classes for hands-on, real-world ISE experience
Closing Notes
- Shell Profiles are platform-native authority: send the attribute the device understands.
- Separate by platform and role, bind with NDG + AD group conditions.
- Pair with Command Sets to enforce least privilege beyond basic priv levels.
- Validate both ends: device CLI (
show privilege,show tacacs, debugs) and ISE Live Logs/Reports.
Upgrade Your Skills – Start Today
“For more in-depth Cisco ISE Mastery Training, subscribe to my YouTube channel Network Journey and join my instructor-led classes.”
Fast-Track to Cisco ISE Mastery Pro (4-month ILT)
Hands-on ISE from fundamentals → TrustSec → pxGrid → Automation → Device Admin. Production-grade labs, troubleshooting bible, and career-ready runbooks.
Course outline & enrollment: https://course.networkjourney.com/ccie-security/
Enroll Now & Future‑Proof Your Career
Email: info@networkjourney.com
WhatsApp / Call: +91 97395 21088


![[Day 23] Cisco ISE Mastery Training: Guest VLAN & Critical VLAN Configuration](https://networkjourney.com/wp-content/uploads/2025/08/Day-23-Cisco-ISE-Mastery-Training-Guest-VLAN-Critical-VLAN-Configuration.png)