Trainer Sagar Dhawan
- Posted on
[Day 97] Cisco ISE Mastery Training: Cluster Node Replacement
Table of Contents
Introduction
When an ISE node (PSN, MnT, PAN) fails, is end-of-life, or needs a hardware refresh, you must replace it without breaking 802.1X, posture, guest/BYOD portals, or pxGrid.
This Article teaches you the repeatable, zero/near-zero downtime workflows to drain, remove, rebuild, rejoin, re-certify, re-sync, and validate a node—GUI + CLI, step by step.
Problem Statement
Real-world pain points the replacement runbook must solve:
- Downtime risk: Removing a PSN wrong = authentication outage.
- State drift: New node missing certs, AD join, pxGrid, patch level.
- Replication gaps: Node joins but policies/identities not syncing.
- Identity flows: PEAP/EAP-TLS break because EAP/Portal certs not assigned.
- Addressing changes: New IP/FQDN forces updates on switches/WLCs/LB.
Solution Overview
Cisco ISE supports distributed deployment where nodes can be:
- Registered from the PAN (GUI) with specific personas/roles.
- Gracefully drained (disable RADIUS service / remove from LB) before removal.
- Rebuilt at the same version/patch, then registered, certified, AD-joined, pxGrid-enabled, and replicated.
- Promoted (Secondary PAN ↔ Primary PAN) to handle primary PAN replacement without losing control.
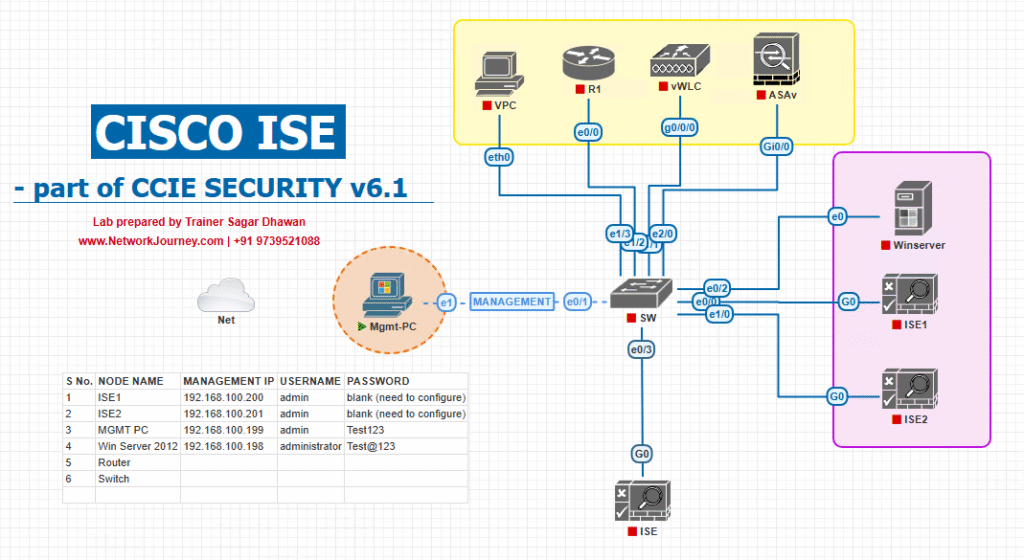
Sample Lab Topology (VMware / EVE-NG)
Compute / VMs
- ISE-PAN-1 (Primary Admin + MnT-Primary)
- ISE-PAN-2 (Secondary Admin + MnT-Secondary)
- ISE-PSN-1, ISE-PSN-2
- Windows AD/ADCS + NTP/DNS
- Linux SFTP repo (backups/logs)
- Clients: Windows 11, iPhone; Jump-host (OpenSSL/curl)
Network
- Catalyst 9300 access (802.1X/MAB test ports)
- WLC 9800 + AP (WPA2-Enterprise SSID)
- Optional LB/Firewall between clients and PSNs
Step-by-Step GUI + CLI Configuration Guide
A) Universal Pre-Flight (all node types)
Goal: Freeze the environment state, prepare a clean replacement, and prevent surprise downtime.
Governance & Prep
- Change ticket approved; backout plan documented.
- Confirm current ISE version + patch on all nodes (GUI: Admin → System → Settings → About).
- Decide same IP/FQDN (preferred, no NAD/LB changes) or new IP/FQDN (requires NAD/LB updates).
- Confirm NTP/DNS servers and time sync on all nodes.
Backups / Repos
- SFTP/NFS Repository tested (GUI: Admin → System → Maintenance → Repository; CLI:
show repository <name>). - Configuration backup (and Operational if replacing MnT) taken and verified in repo (
dir repository <name>). - Export critical System Certificates + Private Key (if policy allows) and Internal CA store if used for BYOD/EST.
Certificates & Identity
- Inventory Admin / EAP / Portal / pxGrid certs per node.
- Plan: reuse wildcard vs per-node CSR; obtain CA-signed cert(s) for the replacement node.
- Confirm AD domain membership strategy (which nodes are joined).
Validation Baseline (before changes)
- RADIUS auth test: switch and WLC CLI tests succeed.
- Portals reachable with valid padlock/chain.
- pxGrid clients connected.
show replication status= SUCCESS everywhere.
B) Scenario 1 — Replace a PSN (safest to practice; minimal user impact)
Overview: Drain PSN-old → remove → build PSN-new → register → certify → AD join → pxGrid → validate → (optional) retire PSN-old.
1) Drain the old PSN (GUI + infra)
- Take PSN-old out of service:
- GUI: Administration → System → Deployment → PSN-old → uncheck Enable RADIUS Service (or disable the node).
- Remove PSN-old from LB pool (if any).
- NAD/WLC: If using server groups, leave other PSNs active; traffic will fail over.
- Validate Drain
- Switch:
test aaa group radius ISE-PSN-GRP user pass show aaa servers debug dot1x events - WLC 9800:
test wireless aaa authentication user radius <server-name> show wireless client mac <mac> detail
- Switch:
[Screenshot: Deployment – PSN node – RADIUS Service disabled]
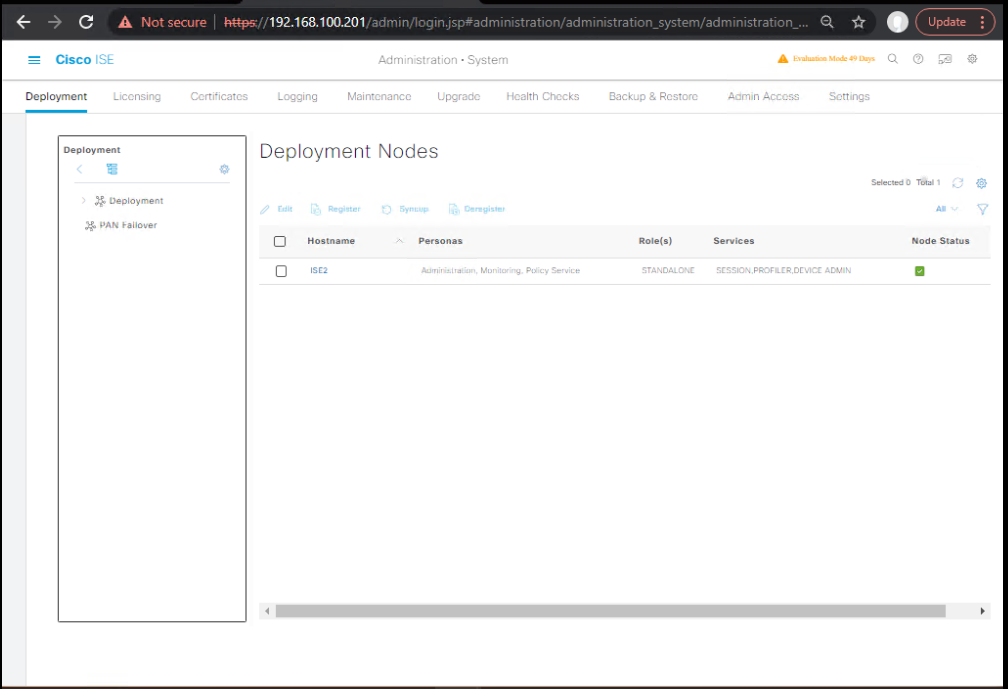
2) Remove PSN-old from Deployment (GUI)
- GUI: Administration → System → Deployment → select PSN-old → Delete.
- If GUI blocks deletion (still “in use”): ensure RADIUS disabled and not marked as Session Services critical dependency.
[Screenshot: Deployment – Delete Node Confirmation]
If PSN-old is unreachable (dead): use Force Delete in GUI; later, on the dead node (if revived) run
application reset-configbefore any reuse.
3) Build PSN-new VM and initial setup (CLI)
- Deploy the same ISE version + patch (or higher if entire deployment is being upgraded in lockstep).
- Console setup (on PSN-new):
# At first boot: - Set hostname/FQDN: ise-psn2.lab.local - Mgmt IP/Mask/GW - DNS, NTP - System timezone - Admin GUI username/password - Verify reachability to PAN, DNS, NTP:
ping <PAN IP/FQDN> show ntp show dns show application status ise
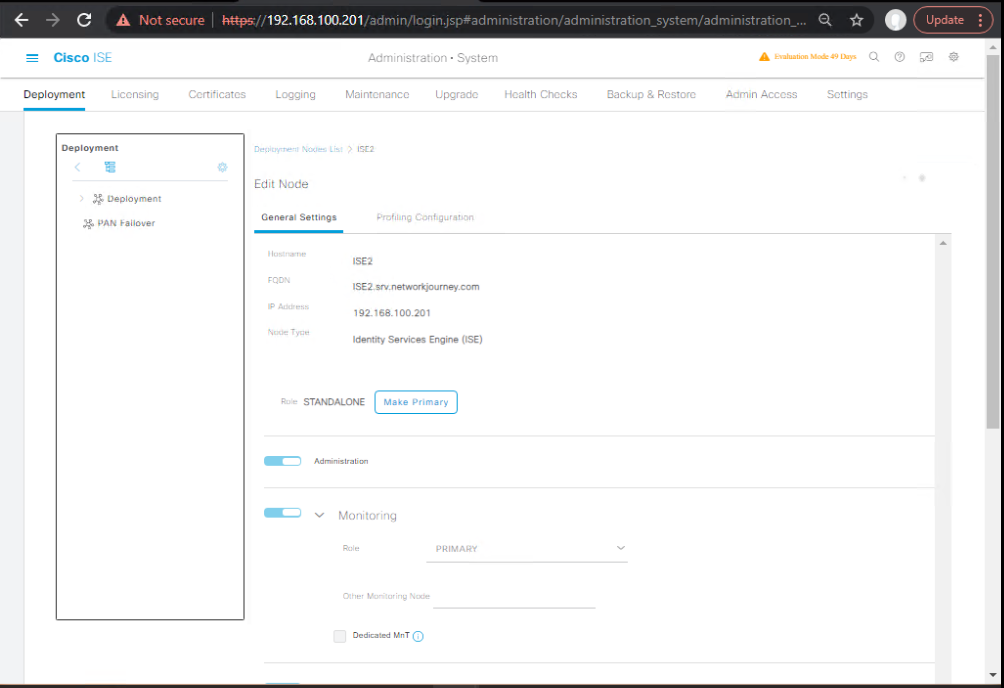
4) Register PSN-new to the Deployment (GUI)
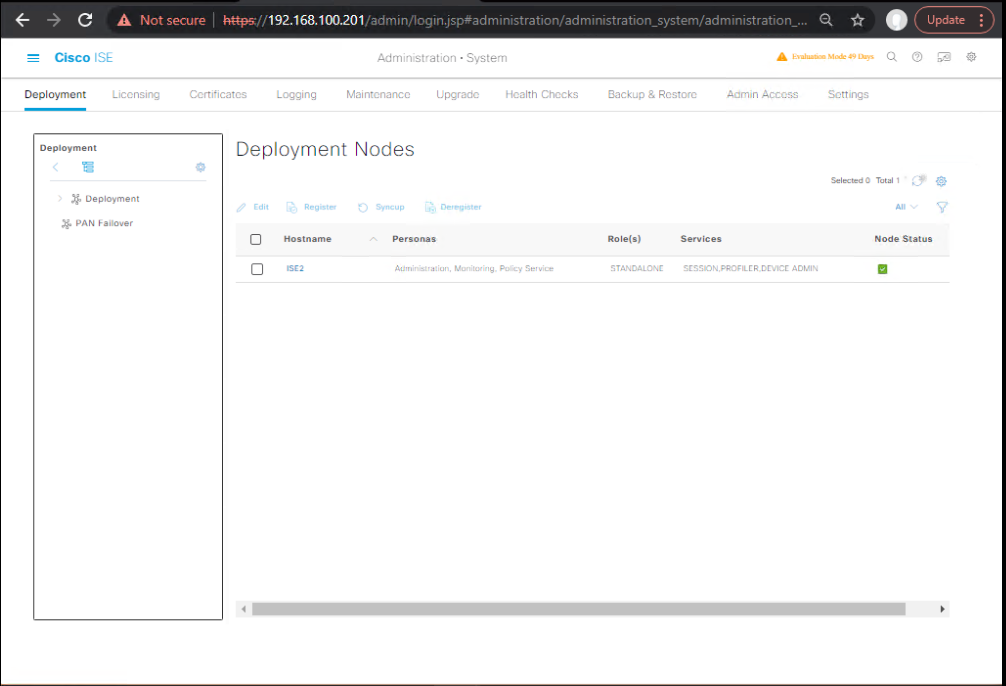
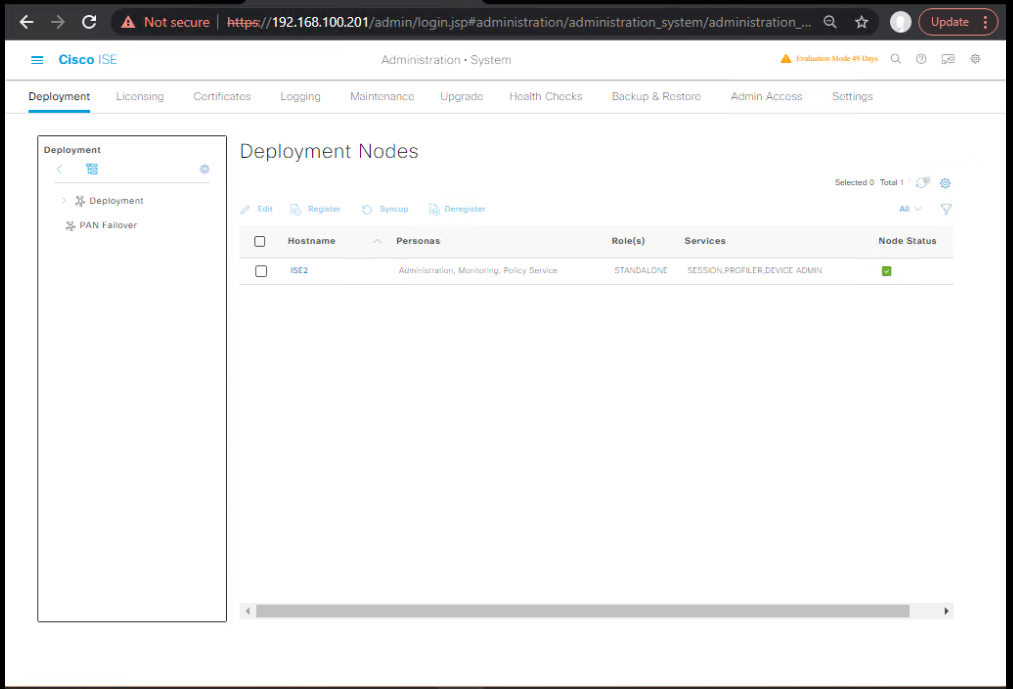
- On PAN: Administration → System → Deployment → Register.
- FQDN/IP of PSN-new
- Admin credentials created during PSN-new setup
- Assign Persona = Policy Service (PSN), enable RADIUS Service, enable Session Services if used.
- (Optional) Enable Device Admin (TACACS+) if your PSN provides TACACS.
- Wait for Connected/Green and Policies replicated.
[Screenshot: Deployment – Register Node Wizard (PSN)]
Validate replication
show replication status
Expect SUCCESS for PSN-new within a few minutes (DB size dependent).
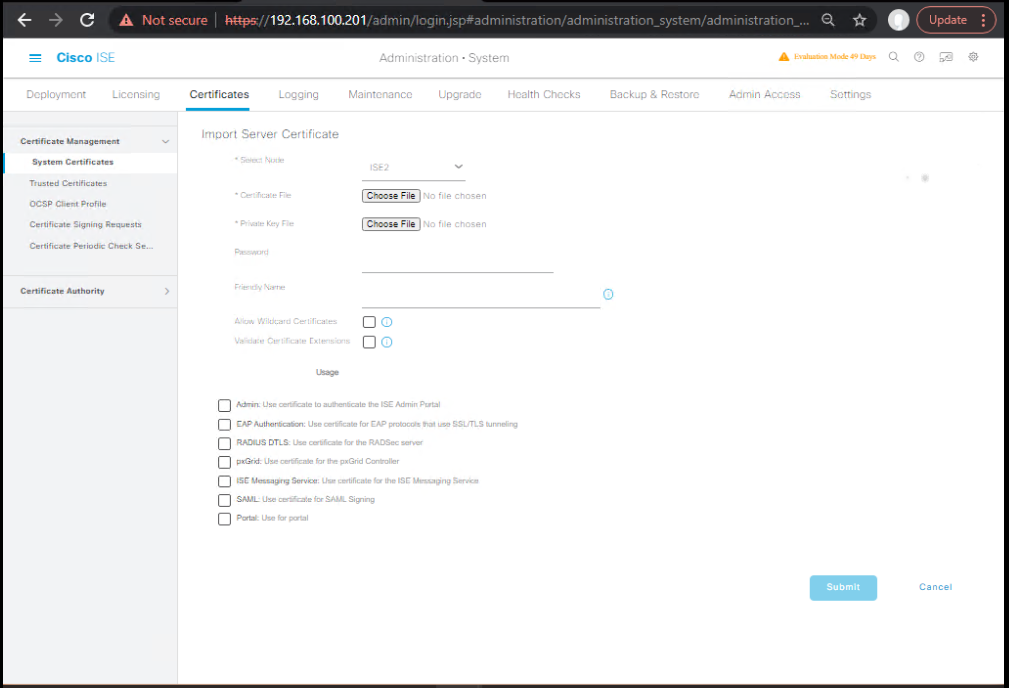
5) Certificates on PSN-new (GUI + client tools)
- If using wildcard or a shared PEM/PFX:
- GUI: Administration → System → Certificates → System Certificates → Import (with private key).
- Assign EAP Authentication and Portal usages to the cert.
- If using per-node certificate:
- Generate CSR on PSN-new (GUI), sign at CA, Bind to CSR.
- Assign EAP/Portal usages.
- Import any Intermediate/Root in Trusted Certificates if not already present via replication.
Validate from jump host
# Portal chain test (HTTPS)
openssl s_client -connect ise-psn-new.lab.local:443 -showcerts </dev/null | openssl x509 -noout -issuer -subject
# EAP-TLS test occurs during client 802.1X authentication
[Screenshot: System Certificates – PSN cert assigned to EAP & Portal]
6) AD Join & pxGrid (if applicable)
- AD Join on PSN-new:
- GUI: Administration → Identity Management → External Identity Sources → Active Directory → → Nodes tab → Join Node (select PSN-new).
- pxGrid: If PSN-new hosts pxGrid services, assign pxGrid cert usage and verify pxGrid Clients status.

Validate
- GUI: AD → Node shows Joined.
- pxGrid Client(s) Online in pxGrid Services → Client Management.
7) Cutover & Final Validation
- If PSN-new uses same IP/FQDN as old, you’re done.
- If new IP/FQDN:
- Update NADs (switches/WLC): RADIUS server IP, shared secret.
- Update LB pools; remove PSN-old, add PSN-new.
RADIUS/Portal Validation
- Switch/WLC test auths (same commands as earlier).
- Live Logs: Operations → RADIUS → Live Logs show successes via PSN-new.
- Portals reachable and padlock valid.
C) Scenario 2 — Replace an MnT Node
Overview: MnT collects logs/reports. Replacing it safely means ensuring operational data backups (if needed) and re-establishing Primary/Secondary roles.
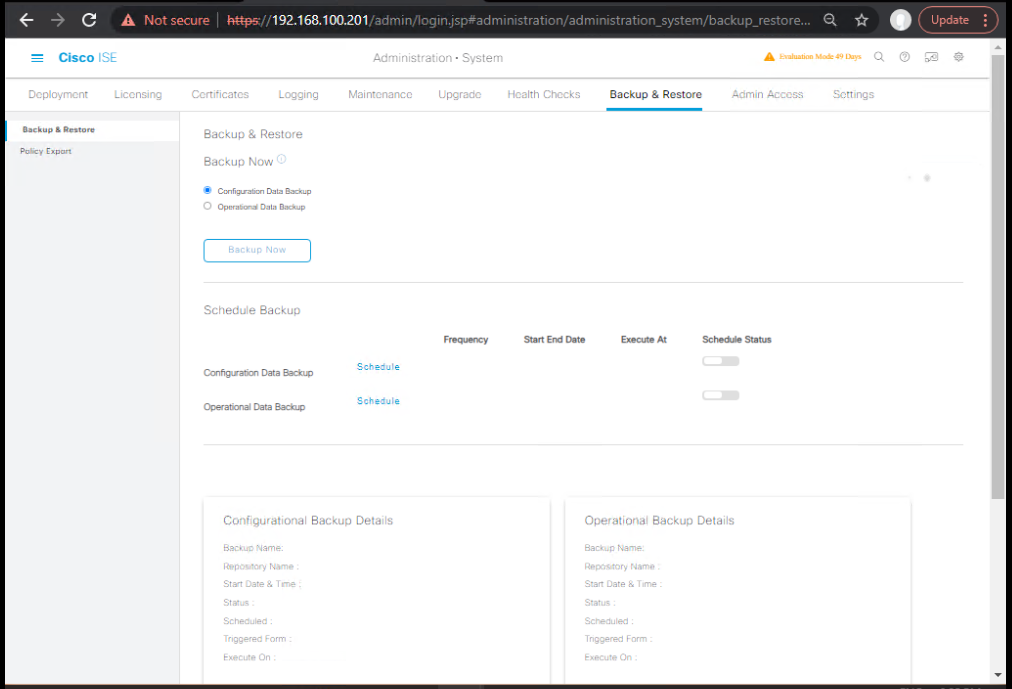
1) Backup MnT data (optional but recommended)
- GUI: Administration → System → Backup & Restore → Operational backup to repo.
- Validate in repo:
dir repository <name>.
[Screenshot: Backup – Operational Data]
2) Remove MnT-old
- GUI: Administration → System → Deployment → select MnT-old → Delete.
- If it’s Primary MnT, first promote Secondary to Primary or temporarily set PAN as MnT-Primary (depends on your design).
3) Build MnT-new VM & setup
- Install same version/patch; perform first-boot setup; validate reachability.
4) Register MnT-new and set roles
- GUI: Deployment → Register → Persona = Monitoring.
- Once registered, set desired Primary/Secondary MnT roles.
[Screenshot: Deployment – MnT registration and role selection]
Validate
- Reports populate in Operations → Reports.
show replication statusshows SUCCESS (config DB).
(Note: operational/log data is not “replicated” the same way; check incoming logs in MnT-new.)
D) Scenario 3 — Replace the Primary PAN (planned)
Two clean options:
- Option A: Promote Secondary PAN → remove Primary PAN-old → register new node as Secondary PAN → (optional) re-promote later.
- Option B: If no Secondary exists, build a new Secondary first, promote, then proceed.
1) Promote Secondary PAN
- GUI: Administration → System → Deployment → select Secondary PAN → Promote to Primary.
- Wait until new Primary is stable/green.
[Screenshot: Deployment – Promote to Primary]
2) Remove PAN-old
- GUI: Deployment → select PAN-old → Delete.
- If unreachable, Force Delete.
3) Build PAN-new VM & setup
- Install same version/patch; initial setup; ensure DNS/NTP.
4) Register PAN-new as Secondary Admin
- GUI: Deployment → Register → Persona = Administration, set Secondary.
- (If MnT role is on PAN, assign MnT Secondary/Primary as per your design.)
- Wait for full sync/green.
5) (Optional) Re-promote PAN roles to your desired steady state
- You can keep PAN-new as Secondary or Promote if you want it to become Primary.
Certificates
- Ensure Admin GUI cert bound on the current Primary; PAN-new must have a valid Admin cert if it will become Primary.
- Verify SAML/ERS/pxGrid signing certs survive or are re-imported if you segregate roles.
Validate
- Admin GUI responsive on Primary; About shows expected Primary node.
show replication statusis SUCCESS on all nodes.- Live authentications continue (PSNs unaffected by PAN swap).
E) Scenario 4 — Replace the Primary PAN (unplanned failure)
When PAN-old is dead and you have Secondary PAN:
- On Secondary PAN, Promote to Primary.
- Rebuild a new node and register it as Secondary PAN.
- Proceed with certs/roles as above.
When no Secondary PAN exists:
- Build a new node (PAN-new), same version/patch.
- Restore latest config backup onto PAN-new:
application restore <backup_name> repository <repo> encryption-key <key> - Re-register PSNs/MnT if needed (depends on recovery state).
- Recreate integrations (pxGrid, ERS) if not captured by backup.
Validate as in Scenario 3.
F) After-Action Validation (All Scenarios)
GUI
- Administration → System → Deployment: All nodes Green with correct personas/roles.
- Identity Sources → AD → Nodes: New node Joined (where required).
- pxGrid Services → Client Management: All clients Online.
- Certificates: Correct Usage (Admin/EAP/Portal/pxGrid), valid chain.
- Operations → RADIUS → Live Logs: Authentications succeeding.
- Operations → Reports: Report generation OK (MnT).
CLI
show application status ise
show replication status
show logging application | include (radius|replication|pxgrid|error|exception)
ping <AD/DC> ; ping <NTP> ; ping <PAN/PSN peers>
Client / Infra
- Switch/WLC AAA tests pass (see commands above).
- Portals reachable (padlock/chain OK).
- LB pool updated (if IP/FQDN changed).
Cisco ISE Cluster Node Replacement – CLI
1. Version & System Health
show version
show application status ise
show logging application ise-psc.log
show logging system
Validate ISE services are running before/after replacement.
2. Network & DNS Validation
ping <peer-node-IP>
ping <gateway-IP>
ping <dns-server-IP>
nslookup <ise-fqdn>
show running-config network
Ensure node has correct DNS & IP reachability.
3. Certificate Validation
show crypto pki certificates
show crypto pki scep
show application certificate list
Confirm certificates are installed and not expired before re-joining cluster.
4. Replication & Cluster Status
show replication status
show application status ise
show logging application ise-psc.log | include replication
Replication should show SUCCESS for all nodes.
5. Backup & Restore
application backup ise_full_backup_2025 repository BACKUP_REPO encryption-key MyKey123
application restore ise_full_backup_2025 repository BACKUP_REPO encryption-key MyKey123
Always backup before removing/replacing a node.
6. PAN Role Checks (Primary/Secondary)
show run | include server
show application status ise | include Admin
Verify which node is PAN Primary vs Secondary before replacement.
7. Policy Service Node (PSN) Validation
test aaa group radius ISE_PSN1 user1 Cisco123
show logging application ise-radius.log
Confirm RADIUS authentication is working after adding/replacing PSN.
8. WLC / Switch Connectivity Validation
On WLC/Switch:
test aaa group radius ISE_GROUP testuser Cisco123 new-code
show authentication sessions
Validate endpoint authentication via the new node.
9. De-registering Old Node (PAN)
On PAN CLI:
application stop ise
application configure ise
# Choose option to deregister
Always stop services before removing node.
10. Joining New Node to Cluster
On new node:
application configure ise
# Select "Register to Primary"
On PAN GUI:
- Navigate → Administration → System → Deployment → Register Node
- Enter FQDN, IP, Role.
11. Post-Replacement Validation Checklist
show version→ Correct ISE versionshow application status ise→ All services runningshow replication status→ SUCCESS- Certificates → Valid and mapped
- Licenses → Visible in GUI
- Auth tests (RADIUS/TACACS) → Passed
- Live Logs (GUI: Operations → RADIUS → Live Logs)
Frequently Asked Questions (FAQs)
1. What are the main reasons for replacing a Cisco ISE node?
- Hardware failure (appliance crash, disk issues).
- VM migration (moving to new ESXi/EVE-NG environment).
- OS corruption or ISE application corruption.
- Upgrading to newer ISE-supported hardware.
- Certificate or hostname/FQDN mismatch.
2. Can I replace a node without affecting production authentication?
Yes, if planned correctly.
- Keep at least one PAN and one PSN online during replacement.
- Replace one node at a time.
- Test authentication via other nodes before removing any node.
3. Do I need to deregister the old node before adding the new one?
Yes.
- GUI: Administration → System → Deployment → Select Node → Deregister.
- CLI:
application stop ise
application configure ise
# Select deregister
This ensures database replication and cluster health are not broken.
4. How do I ensure the new node has correct certificates before joining?
- Generate CSR from Administration → System → Certificates on the new node.
- Submit CSR to your internal/external CA.
- Install the same Trusted Root & Intermediate certs as the existing cluster.
- Validate using:
show crypto pki certificates
5. How do I validate replication status after adding the new node?
CLI:
show replication status
Expected output:
- SUCCESS for all nodes.
- No “out-of-sync” states.
GUI:
- Administration → System → Deployment → Replication Status.
6. What if replication shows “IN_PROGRESS” or “FAILED”?
- Check NTP sync across nodes.
- Ensure correct DNS resolution of all nodes.
- Verify TCP/7800 (Replication Port) connectivity.
- Restart application services on the new node:
application stop ise
application start ise
7. Do I need to back up before replacing a node?
Yes — Always!
Backup steps:
application backup ise_full_backup_2025 repository BACKUP_REPO encryption-key MyKey123
This ensures you can restore if something fails during deregistration or rejoin.
8. How do I reassign roles (PAN, MnT, PSN) to the new node?
- GUI: Administration → System → Deployment → Edit Node → Assign Role.
- Roles supported:
- Primary PAN
- Secondary PAN
- Monitoring Node
- PSN
- Validate via CLI:
show application status ise | include Admin
9. What happens to active sessions when a PSN node is replaced?
- Sessions handled by that PSN are lost.
- Endpoints must reauthenticate to another available PSN.
- Use load balancing/WLC failover to reduce downtime.
10. How do I confirm that authentication is working after node replacement?
- CLI test:
test aaa group radius ISE_PSN1 user1 Cisco123
- GUI validation:
Operations → RADIUS → Live Logs - Switch/WLC validation:
show authentication sessions
YouTube Link
For more in-depth Cisco ISE Mastery Training, subscribe to my YouTube channel Network Journey and join my instructor-led classes for hands-on, real-world ISE experience
Closing Notes
Node replacement is a disciplined sequence: Drain → Delete → Build → Register → Certify → AD Join → pxGrid → Validate.
Adopt same IP/FQDN where possible; treat certs and AD join as first-class tasks; never exit without replication SUCCESS+AAA tests green.
Upgrade Your Skills – Start Today
For more in-depth Cisco ISE Mastery Training, subscribe to my YouTube channel Network Journey and join my instructor-led classes.
Fast-Track to Cisco ISE Mastery Pro
- I run a focused 4-month instructor-led CCIE Security training with live ISE labs (node replacement, upgrades, DR/backup, cert lifecycle), graded workbook tasks, and interview prep.
- Course outline & enrollment: https://course.networkjourney.com/ccie-security/
- Next step: Submit the intake form on the course page → get a free readiness call + lab access checklist.
Enroll Now & Future‑Proof Your Career
Email: info@networkjourney.com
WhatsApp / Call: +91 97395 21088