Trainer Sagar Dhawan
- Posted on
[Day 98] Cisco ISE Mastery Training: Advanced Policy Sets
Table of Contents
Introduction
Policy Sets are the traffic control tower of Cisco ISE. They decide how to authenticate and what to authorize for each session—wired, wireless, VPN, or device admin. “Advanced” means you’ll leverage compound conditions, policy inheritance, result elements (dACL, VLAN, SGT, URL-redirect), profiling & posture, time/date, device type/location, and TACACS+ command sets—and you’ll verify all of it with GUI & CLI like a production change.
Problem Statement
Typical NAC pain you must solve with advanced policy logic:
- One flat policy set becomes unmanageable and risky.
- Different access types (WLAN SSIDs, wired 802.1X/MAB, contractors, IoT, voice) need unique authN/authZ.
- Dynamic access (VLAN/dACL/SGT/redirect) must be consistent, auditable, least-privilege.
- Posture and BYOD flows require pre-posture and remediate stages with CoA.
- Device Admin (TACACS+) must enforce role-based commands by device type/location.
Solution Overview
Cisco ISE Policy Sets provide:
- Top-level Policy Sets → each with Conditions, Authentication Policy (Allowed Protocols, Identity Sources/Sequences) and Authorization Policy (rule list).
- Results (Policy Elements) → Authorization Profiles, Downloadable ACLs, Security Group Tags (SGT), URL-Redirection, VLAN, Airespace ACL (WLC), TACACS+ Shell/Command Sets.
- Condition Studio → build compound conditions (e.g., Device:WLC AND SSID=Corp AND Time=BusinessHours).
- Hit Counters & Policy Trace → validate rule hits and troubleshoot mismatches fast.
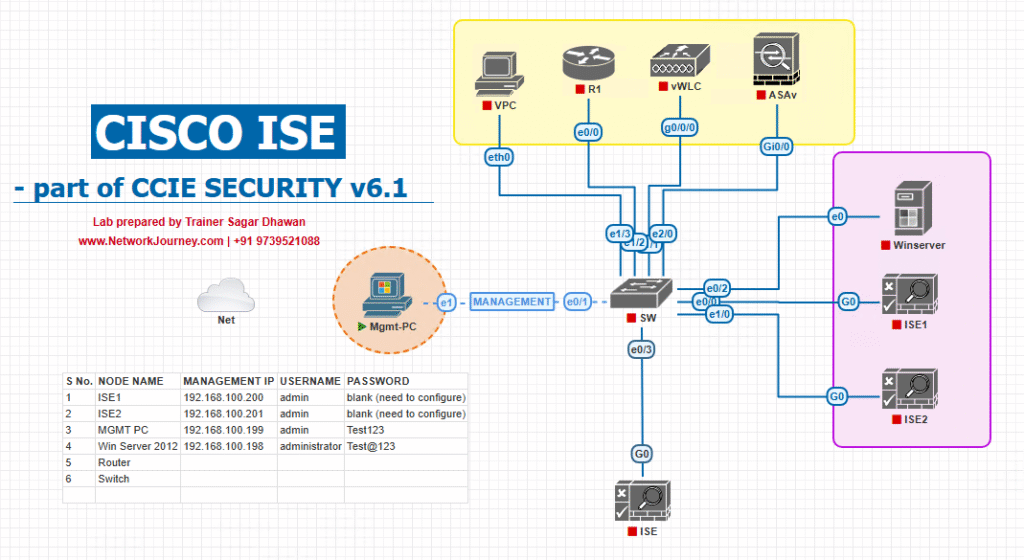
Sample Lab Topology (VMware/EVE-NG)
Compute / VMs
- ISE-PAN/MnT (Primary), ISE-PSN1, ISE-PSN2
- AD/LDAP + ADCS (CA)
- Linux SFTP (optional for logs/backup)
- Windows 11 (802.1X), macOS (802.1X), iPhone (WPA2-Enterprise), IoT printer, IP phone
- Jump host (OpenSSL/curl)
Network
- Catalyst 9300 (access) — 802.1X/MAB, dACL, SGT
- WLC 9800 + AP — WLANs: Corp-8021X, Guest-Portal, IoT-MAB
Step-by-Step GUI Configuration Guide
A) Pre-Flight: Build Blocks & Hygiene
Tick-Box Checklist
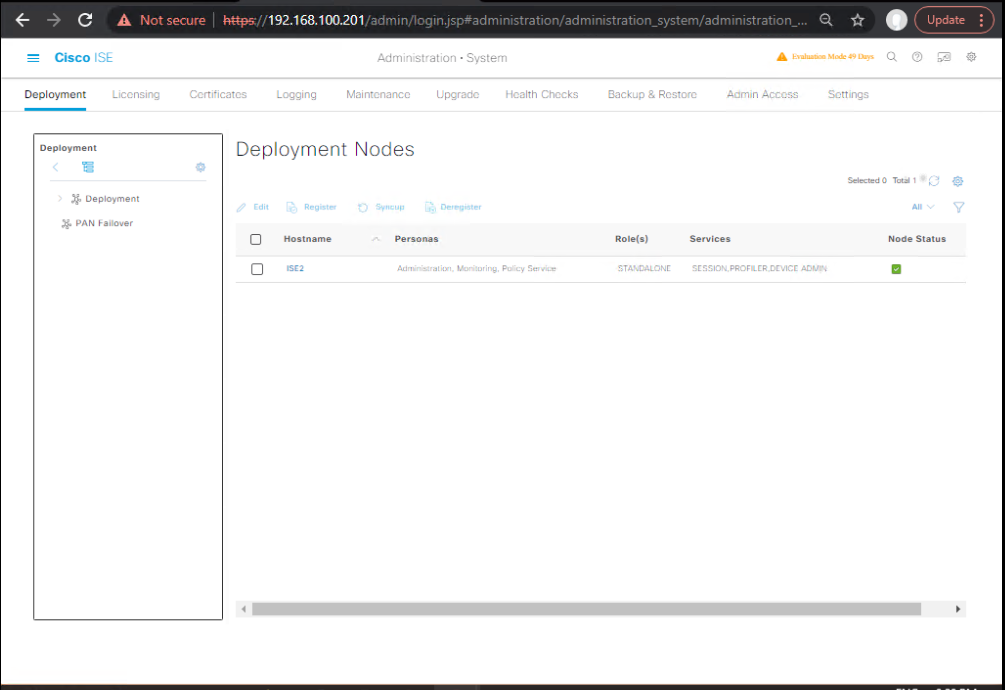
- ISE Deployment healthy (PAN+PSNs Green).
- NTP/DNS/Certificates valid; EAP/Portal cert chain trusted.
- Network Devices (Switch, WLC, VPN) added with correct RADIUS key, Device Type, Location.
- Endpoint Identity Groups planned (Corp-Domain-PCs, BYOD, Printers, Phones, IoT, Contractors).
- AD Join complete; Identity Source Sequences designed (e.g., AD → Internal Users → MAB).
- Allowed Protocols sets defined (e.g., “Default Network Access” or custom EAP-TLS/PEAP-MSCHAPv2/MAB).
- dACLs/VLANs/SGTs you intend to use are pre-created under Policy Elements.
B) Create Policy Elements (Results) first
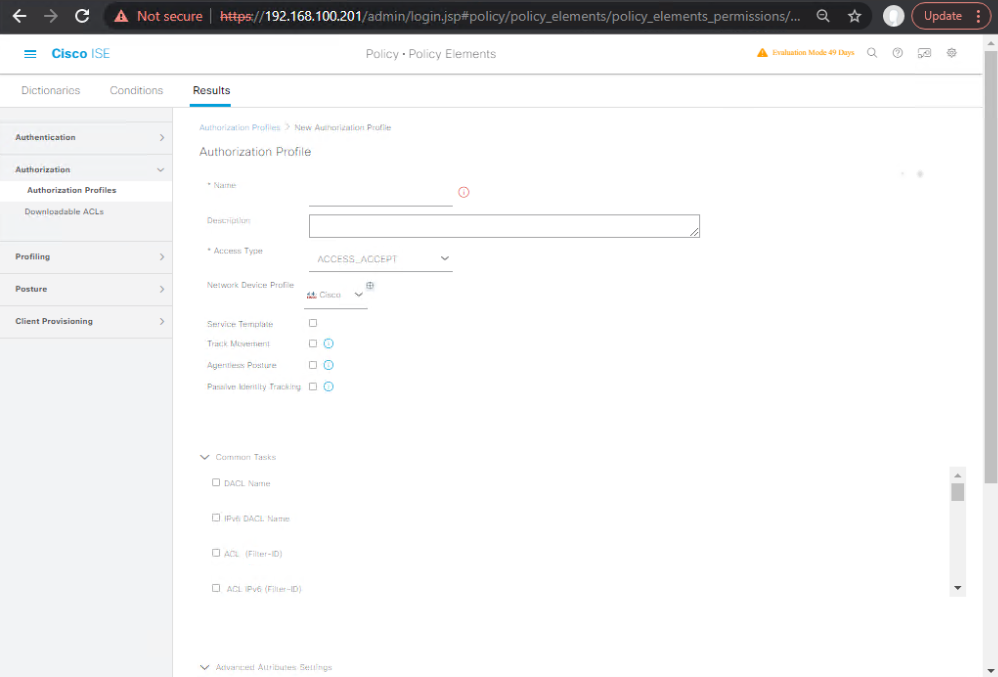
- Authorization Profiles
GUI: Policy → Policy Elements → Results → Authorization → Authorization Profiles → Add
- Corp-Full-Access → dACL: ALLOW-CORP or VLAN: Corp-Data; SGT: Employees; Reauth:
No. - Quarantine-Posture → dACL: QUAR + URL-Redirect to ISE posture portal; Reauth:
Session. - Guest-Internet-Only → WLC Airespace ACL or dACL limiting RFC1918; SGT: Guest.
- IoT-Printer-Limited → dACL: PRN-ONLY (allow print servers); SGT: Printers.
- Voice-VLAN → VLAN: 20; *cisco-avpair=device-traffic-class=voice.
- Contractor-Limited → dACL: CONTRACTOR-LIMIT; SGT: Contractors, Time: BusinessHours (handled in rule).
- Downloadable ACLs (dACLs)
GUI: Policy → Policy Elements → Results → Authorization → Downloadable ACLs → Add
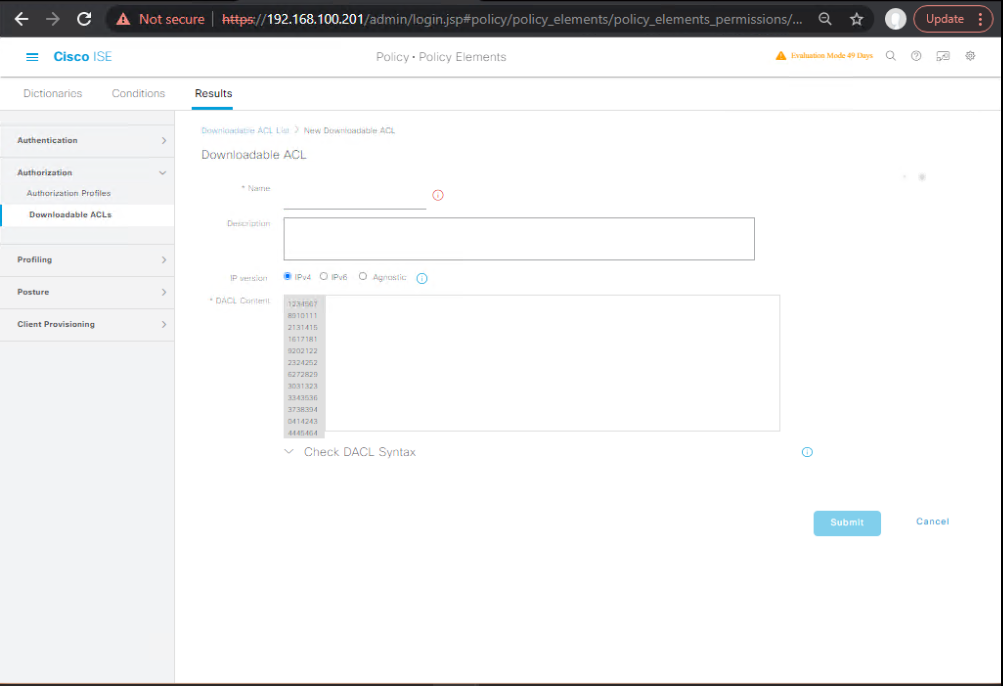
- ALLOW-CORP:
permit ip any 10.10.0.0 0.0.255.255 permit udp any any eq 53 permit tcp any any eq 443 deny ip any any - QUAR:
deny tcp any 10.0.0.0 0.255.255.255 permit tcp any any eq 80 permit tcp any any eq 443 - PRN-ONLY: allow print servers/ports only.
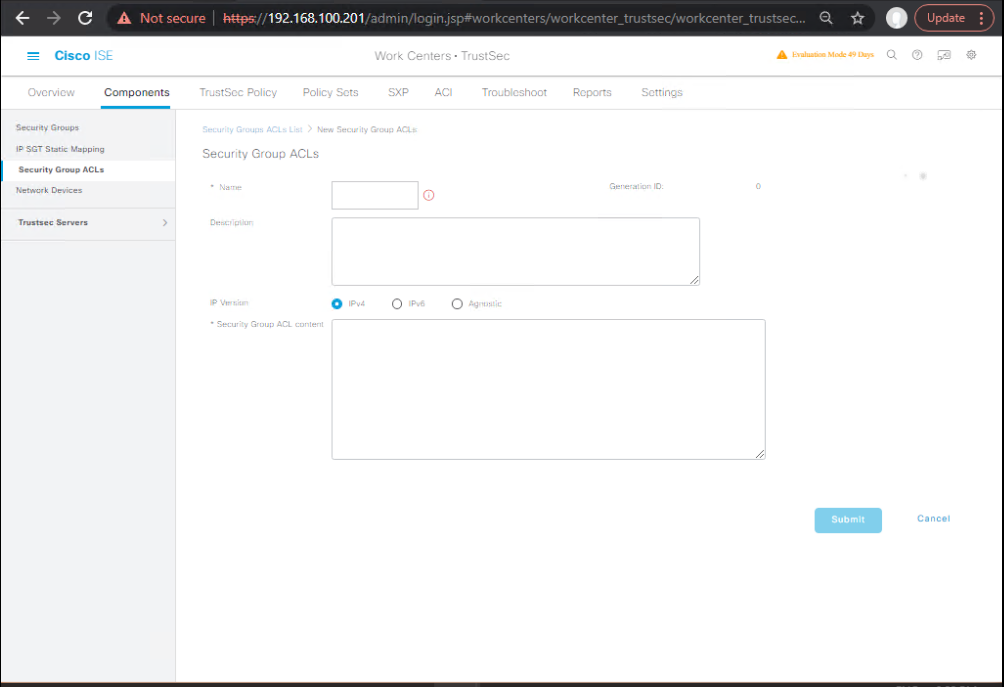
- Security Group Tags (SGT) (if TrustSec/SD-Access)
GUI: Work Centers → TrustSec → Components → Security Groups → Add
- Employees(2), Contractors(5), Guests(8), Printers(20), Phones(30)
Then map in Authorization Profiles.
[Screenshot: TrustSec – Add SGT]
- Time & Date Conditions
GUI: Policy → Policy Elements → Conditions → Library → Date & Time → Add
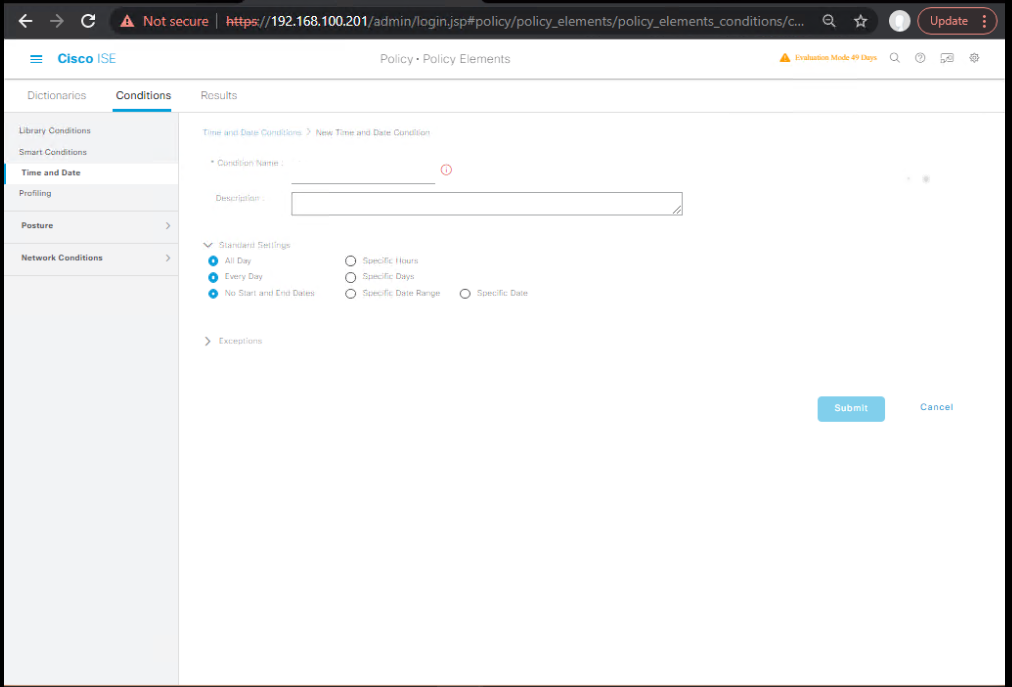
- BusinessHours: Mon–Fri 08:00–18:00.
C) Build Advanced Policy Set (RADIUS – Network Access)
- Add Policy Set
GUI: Policy → Policy Sets → Add
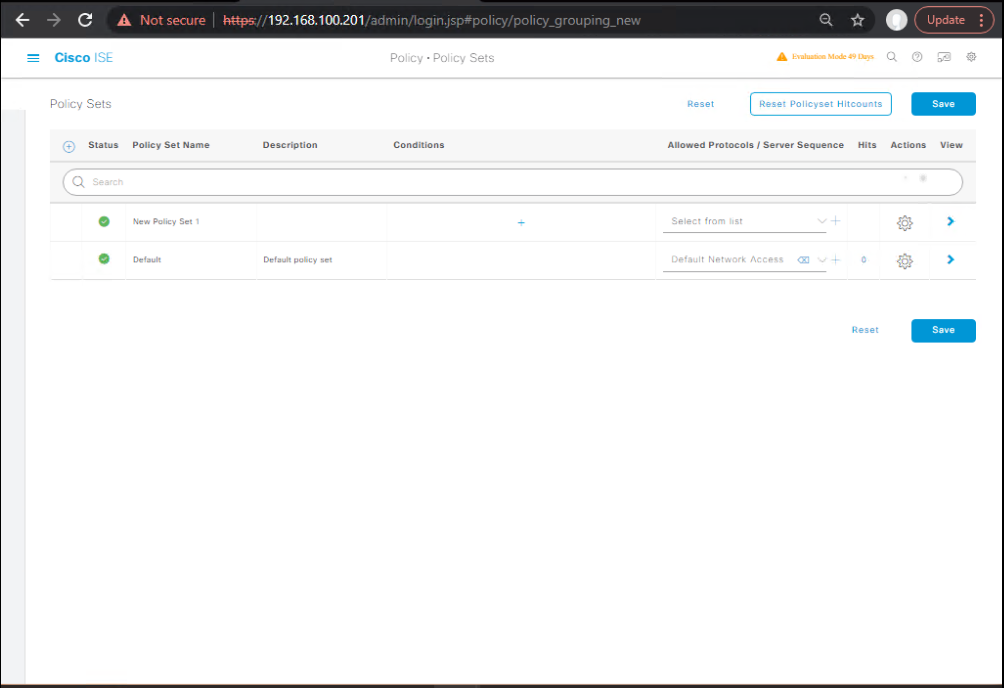
- Name: RADIUS-Enterprise
- Condition:
Device:Device Type IN [Switch, WLC] - Allowed Protocols: Default Network Access (or your custom set)
- Authentication Policy (within the Policy Set)
Order matters (top-down):
- Rule 1: WLC-Corp-SSID → Condition:
Network Access:UseCase = WirelessDOT1X AND Airespace:SSID = "Corp-8021X"→ Identity Source Seq:AD_Sequence - Rule 2: Wired-8021X → Condition:
Network Access:UseCase = WiredDOT1X→ Identity Source:AD_Sequence - Rule 3: MAB-IoT/Printer/Phone → Condition:
Network Access:AuthenticationMethod = MAB→ Identity Source:Internal Endpoints - Default: DenyAccess (or fallback to MAB if you prefer)
GUI Validation:
- Toggle Hit Counter (gear icon) once traffic flows; ensure rules increment.
CLI Validation (Switch/WLC):
# Switch (Wired 802.1X)
show authentication sessions interface Gi1/0/10 details
test aaa group radius ISE_PSN user1 SuperSecret
debug dot1x events
debug radius authentication
# WLC (Wireless 802.1X)
show wireless client mac <MAC> detail
test wireless aaa authentication <user> radius <server>
debug client <MAC>
- Authorization Policy (within the Policy Set)
Create specific → general → default sequence:
- AuthZ-1: Corp-Managed + EAP-TLS → Full Access
Condition:AD-Group = Corp\Domain UsersNetwork Access:EapTunnel = EAP-TLS
Result: Authorization Profile = Corp-Full-Access (dACL/VLAN/SGT)
- AuthZ-2: Posture Non-Compliant → Quarantine
Condition:PostureStatus = NonCompliant
Result: Quarantine-Posture (dACL QUAR + URL-Redirect) - AuthZ-3: BYOD Registered → Limited
Condition:Endpoint Identity Group = RegisteredDevices
Result: Contractor-Limited (dACL CONTRACTOR-LIMIT; SGT Contractors) - AuthZ-4: Guests via SSID
Condition:Airespace:SSID = "Guest-Portal"
Result: Guest-Internet-Only - AuthZ-5: Printers (Profiled) → Printer-Only
Condition:Device:Profile = HP-PrinterOREndpoint Identity Group = Printers
Result: IoT-Printer-Limited - AuthZ-6: Voice Phone (CDP/LLDP/Device-Profile)
Condition:Device:Profile = IP-PhoneORNetwork Access:NAS-Port-Type = Ethernet AND cdpCachePlatform contains "IP Phone"
Result: Voice-VLAN - AuthZ-7: Contractors + BusinessHours
Condition:AD-Group = Corp\Contractors AND BusinessHours
Result: Contractor-Limited
Add a second rule denying out-of-hours if needed (withNOT BusinessHours). - Default:
DenyAccess(or Very-Limited w/ basic services)
GUI Validation:
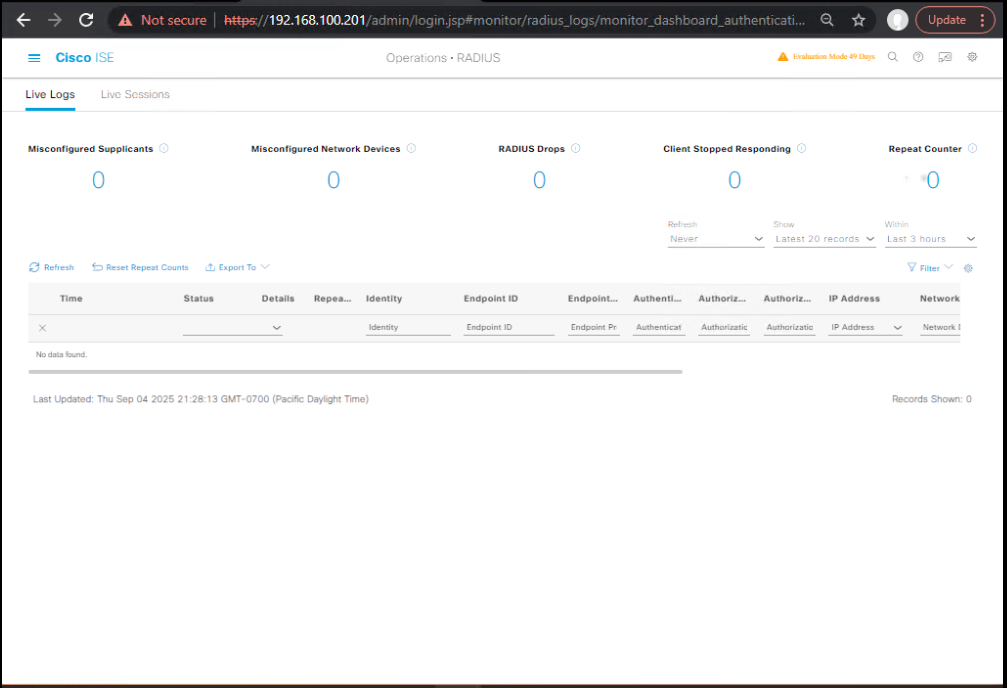
- Operations → RADIUS → Live Logs: verify Rule/Result columns (hit rule name, dACL, SGT).
- Operations → Live Sessions: confirm CoA events for posture/BYOD.
Switch/WLC Validation:
# Switch: observe result elements
show authentication sessions interface Gi1/0/10 details
show access-lists dynamic | inc i<dACL-name>   (IOS-XE shows ephemeral ACLs)
show cts role-based sgt-map all                (if TrustSec/SGT used)
# Force reauth to trigger new policy:
clear authentication sessions interface Gi1/0/10
# WLC:
show wlan id <id>
show client detail <MAC> | i Policy|ACL|VLAN
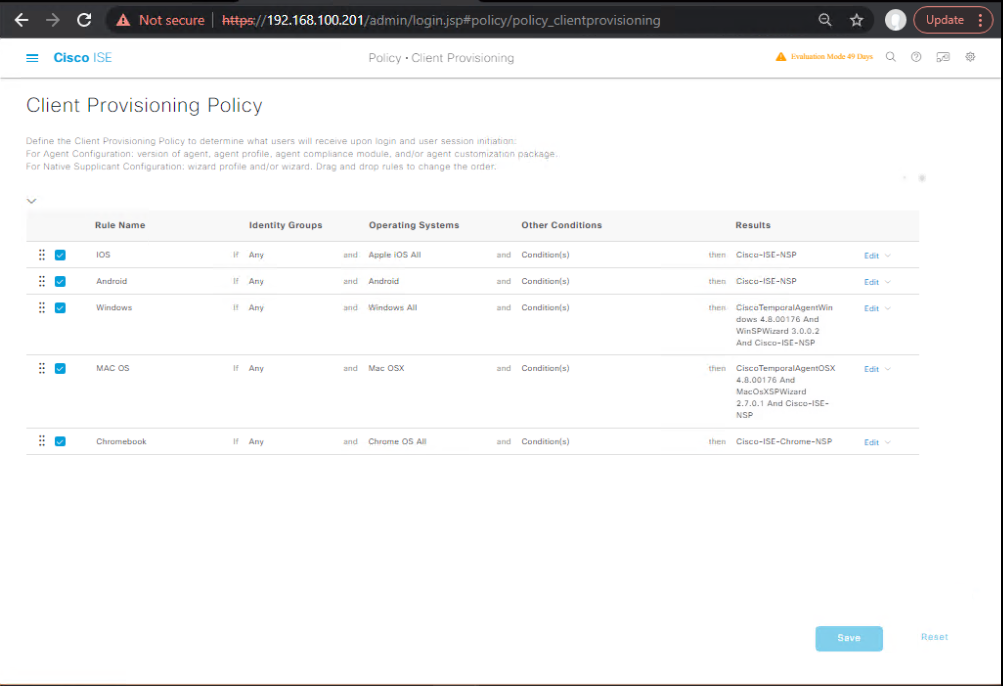
D) BYOD/Guest/Posture wiring in the same Policy Set
- Client Provisioning (Posture)
GUI: Policy → Client Provisioning → create AnyConnect posture rule (OS mapping). - Posture Requirements
GUI: Policy → Posture → define NonCompliant → redirect logic. - AuthZ rules already redirect NonCompliant to posture portal (above).
Validation: On endpoint, AnyConnect posture agent runs; CoA moves user to Compliant Authorization Profile.
E) TACACS+ (Device Administration) Advanced Policy Set
- Enable Device Admin
GUI: Administration → Device Administration → Settings → Enable. - TACACS+ Policy Elements
- Shell Profiles:Policy → Policy Elements → Results → TACACS Profiles
- NetOps-Priv15:
priv-lvl=15 - Ops-Priv5:
priv-lvl=5
- NetOps-Priv15:
- Command Sets:Policy → Policy Elements → Results → TACACS Command Sets
- Ops-RO:
permit show .*;deny configure .* - NetOps-Full:
permit .*
- Ops-RO:
- Device Admin Policy Set
GUI: Policy → Policy Sets → Add
- Name: TACACS-DeviceAdmin
- Condition:
Device:Device Type IN [Core, Distribution, Access]ANDProtocol = TACACS - Authentication: use Internal Users or AD.
- Authorization Rules:
- Rule 1:
AD-Group = NetOps→ Shell=Priv15, CommandSet=NetOps-Full - Rule 2:
AD-Group = Ops-RO→ Shell=Priv5, CommandSet=Ops-RO - Default: Deny
- Rule 1:
Validation (Device CLI):
# On switch/router using TACACS+
show aaa servers
test aaa group tacacs+ netops_user MyPw new-code
# Try 'conf t' as Ops-RO (should be denied), as NetOps (permitted)
GUI Validation: Operations → TACACS → Live Logs (result shows Shell and CommandSet applied).
F) Policy Simulator / Trace (fast troubleshooting)
- Operations → Troubleshoot → Policy (or Live Logs → “Details” → Policy tab):
Enter MAC/Username/NAD to simulate.
Validate which rule matches and which results are returned.
G) Operational Playbook – Quick Changes
Change VLAN for Printers
- Edit IoT-Printer-Limited profile → VLAN to 30 → Save.
- Reauth endpoints:
clear authentication session interface Gi1/0/x. - Verify Live Logs and switch interface VLAN update.
Add New Contractor Group “Vendors”
- Create dACL VENDOR-LIMIT.
- Add AuthZ rule above default:
AD-Group = Vendors AND BusinessHours→ VENDOR-LIMIT. - Validate with test account + Hit Counter.
Advanced Policy Sets Troubleshooting:
Step 1: Verify Policy Set Hit
- GUI → Operations → RADIUS → Live Logs
- Check if endpoint authentication request matches any Policy Set.
- CLI (PAN/PSN):
show logging application ise-policy.log | include <endpoint-mac> - If NO hit → Move to Step 2.
- If YES but wrong policy hit → Move to Step 3.
Step 2: Verify Protocol & Allowed Requests
- Ensure endpoint traffic matches enabled protocols in ISE:
GUI → Administration → System → Deployment → [PSN] → Protocols- RADIUS
- TACACS+
- CLI:
show application status ise | include Radius - If protocol mismatch → Fix PSN settings.
Step 3: Validate Policy Set Conditions
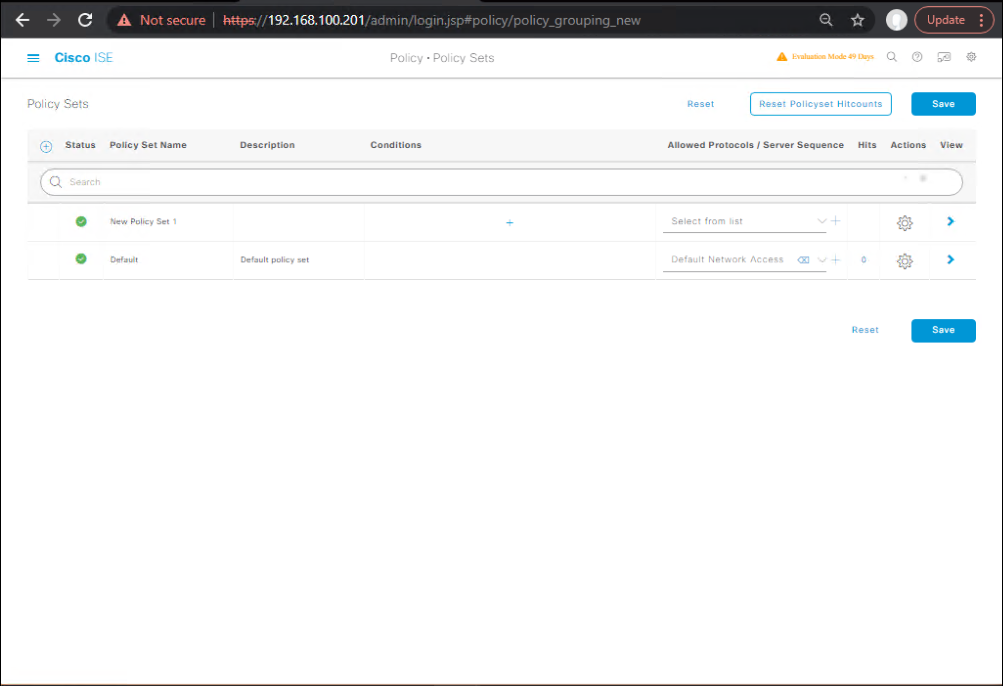
- GUI → Policy → Policy Sets → [Selected Set] → Conditions
- Check Device Type, Location, Protocol, SGT, NDG (Network Device Group).
- CLI (PAN DB export for quick check):
show run | include PolicySet - Wrong NDG mapping? Fix device assignment.
Step 4: Validate Authentication Policy
- GUI → Policy → Authentication Policy inside selected Policy Set.
- Confirm correct Identity Source Sequence (e.g., AD, Internal Users, Certificate).
- CLI (AD join check):
show logging application ise-psc.log | include ad-join - If AD join failed → Re-join domain.
Step 5: Validate Authorization Policy
- GUI → Policy → Authorization Policy inside selected Policy Set.
- Check rules are ordered correctly (top-down, first match).
- Confirm results: VLAN, SGT, ACL, DACL.
- CLI (DACL push to switch):
show logging application ise-acl.log
Step 6: Validate Device Registration
- GUI → Administration → Network Devices → [Device]
- Ensure RADIUS key matches device configuration.
- CLI (on switch/WLC):
test aaa group radius ISE-GROUP user1 Cisco123 new-code show authentication sessions interface Gi1/0/10
Step 7: Validate Certificates
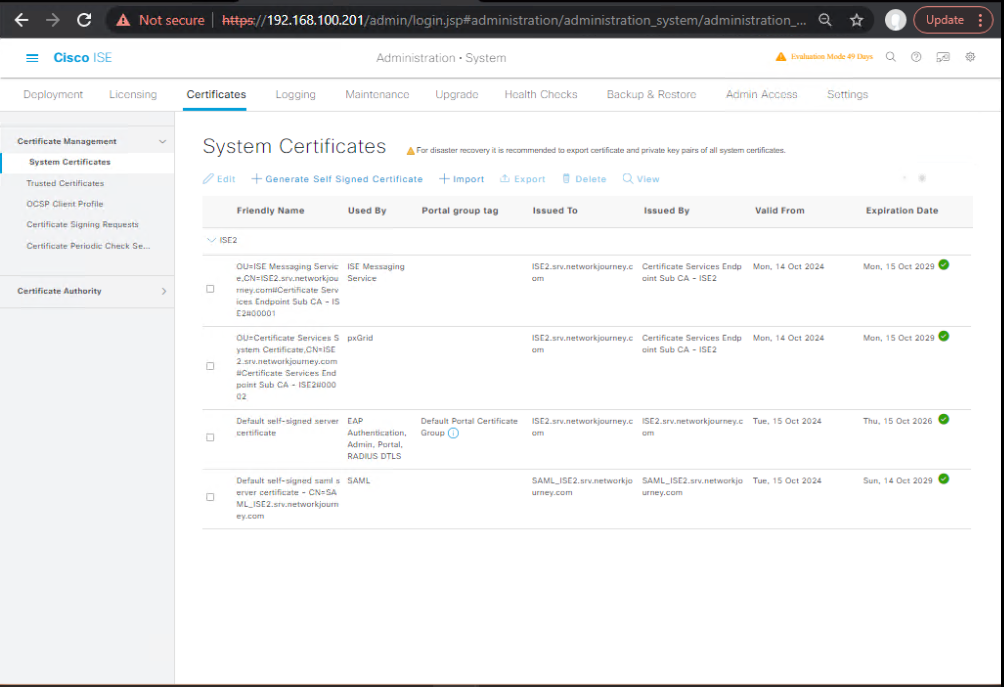
- GUI → Administration → Certificates → System Certificates
- Ensure correct role assignments (Admin, EAP, pxGrid, etc.).
- CLI:
show crypto pki certificates - Expired cert = failed EAP auth.
Step 8: Review Logs for Root Cause
- GUI: Operations → Live Logs → Details (check “Step” failures).
- CLI:
show logging application ise-radius.log show logging application ise-psc.log show logging application ise-acs.log
Step 9: Apply Debugging (Optional on Device Side)
- On switch:
debug radius all debug aaa authentication show authentication sessions - On WLC:
debug aaa all enable debug client <mac>
Step 10: Re-test & Confirm
- Retry authentication with same endpoint.
- Confirm correct Policy Set hit, Auth success, Authz result applied.
- GUI → Live Logs “✓” green success.
- CLI → Session entry in switch shows correct VLAN/SGT.
FAQs
FAQ 1. What is the difference between “Default Policy Set” and custom Policy Sets in ISE?
- Answer:
- The Default Policy Set acts as a catch-all for any request that doesn’t match a custom set.
- Custom Policy Sets allow administrators to build context-based rules (per site, per device type, per business unit).
- Validation:
- GUI → Policy → Policy Sets → Observe order and “Default” at the bottom.
- CLI:
show logging application ise-policy.log | include default
FAQ 2. Why is my authentication request not hitting the intended Policy Set?
- Answer:
- Likely wrong conditions (e.g., NDG misconfigured, protocol mismatch).
- Validation:
- GUI → Operations → RADIUS → Live Logs → Details → Check “Matched Policy Set.”
- CLI:
show logging application ise-radius.log | include <endpoint-mac>
FAQ 3. How do I prioritize Policy Sets in Cisco ISE?
- Answer:
- Policy Sets are evaluated top-down, first match wins.
- Use the re-order (drag-and-drop) function in GUI.
- Validation:
- GUI → Policy → Policy Sets → Verify order.
- Test with test aaa group radius from switch to confirm which set matches.
FAQ 4. Can I use multiple identity sources (AD + Internal + Certificate) in one Policy Set?
- Answer:
- Yes, by configuring an Identity Source Sequence (ISS).
- Validation:
- GUI → Policy → Authentication Policy → Select Identity Source Sequence.
- CLI:
show logging application ise-psc.log | include IdentitySource
FAQ 5. Why do my Authorization Policies fail even though Authentication passes?
- Answer:
- Usually due to incorrect conditions (e.g., AD group mismatch, case-sensitive attributes).
- Validation:
- GUI → Operations → Live Logs → Details → Check “AuthZ Policy Matched.”
- CLI:
show logging application ise-acl.log
FAQ 6. How do I test a Policy Set without disrupting production?
- Answer:
- Create a lab/test Policy Set with conditions that match a test device/user only.
- Use test aaa from switch to simulate.
- Validation:
- GUI → Confirm test device hits only the lab Policy Set.
- CLI:
test aaa group radius ISE user test123 password new-code
FAQ 7. Do Policy Sets support both RADIUS and TACACS+ simultaneously?
- Answer:
- Yes. A Policy Set can include both RADIUS-based authentication (dot1x, MAB, VPN) and TACACS+ (device admin).
- Validation:
- GUI → Policy Sets → Conditions → Add protocol = RADIUS or TACACS+.
- CLI:
show application status ise | include radius show application status ise | include tacacs
FAQ 8. Why is my Policy Set condition using NDG not working?
- Answer:
- Device might not be mapped to correct NDG.
- Validation:
- GUI → Administration → Network Devices → Edit Device → NDG.
- CLI:
show run | include device
FAQ 9. Can I export/import Policy Sets between ISE nodes?
- Answer:
- Yes, via ISE backup/restore or Policy Export/Import feature.
- Validation:
- GUI → Administration → System → Backup & Restore → Ensure “Policy” checked.
- CLI:
application configure ise(for backup/restore ops)
FAQ 10. How do I troubleshoot when the wrong VLAN/SGT is applied even though the correct Policy Set was hit?
- Answer:
- Check Authorization Result mapping → ensure VLAN/SGT is configured and applied correctly.
- Validation:
- GUI → Policy → Results → Authorization → Authorization Profiles.
- CLI (on switch):
show authentication sessions interface Gi1/0/10 show cts role-based sgt-map
YouTube Link
For more in-depth Cisco ISE Mastery Training, subscribe to my YouTube channel Network Journey and join my instructor-led classes for hands-on, real-world ISE experience
Closing Notes
- Build reusable results (Profiles, dACLs, SGTs) once; reference them in rules.
- Keep policies specific-to-general, enable Hit Counters, and always validate with Live Logs + device CLIs.
- Use time conditions and group-based segmentation to enforce least-privilege and business context.
- Treat TACACS as its own world: shell levels + command sets, per device type/location.
Upgrade Your Skills – Start Today
For more in-depth Cisco ISE Mastery Training, subscribe to my YouTube channel Network Journey and join my instructor-led classes.
Fast-Track to Cisco ISE Mastery Pro
- I run a focused-month instructor-led CCIE Security track—weekly ISE labs (advanced policy sets, posture, TrustSec/SGT, TACACS+), graded workbooks, and production-style drills.
- Course outline & enrollment: https://course.networkjourney.com/ccie-security/
- Next step: Fill the intake form → free readiness call + lab access checklist.
Enroll Now & Future‑Proof Your Career
Email: info@networkjourney.com
WhatsApp / Call: +91 97395 21088